How To Pack Camera Gear For Bike Rides Or Cycling Tours
In this guide, we’ll show you how to pack camera gear for bike rides or cycling tours so your kit stays safe, balanced, and easy to reach. If you’ve ever wondered how to pack camera gear for bike rides or cycling tours, you’re in the right place. We’ll cover everything from choosing a bike-friendly backpack to quick-access hacks that help you grab that perfect shot on the go. By the end, you’ll have a streamlined setup that keeps your gear protected without slowing you down.
Create your gear checklist
Before you start stuffing pockets, list every item you need on the road. A solid checklist prevents last-minute “oops, I forgot that” moments. Typical essentials include:
- Camera bodies (primary mirrorless or DSLR, plus backup)
- Lenses (wide-angle, telephoto, prime)
- Memory cards and a card wallet
- Spare batteries and a charger
- Lens filters (ND, polarizer)
- Cleaning kit (blower, microfiber cloth, sensor pen)
- Remote shutter release or intervalometer
- Tripod or mini-tripod
- Cables, USB hub, power bank
- Rain cover or dry bags
For tips on the best order to pack your bodies and glass, check out the best packing order for cameras and accessories. Once your list is set, tick off each item before you head out.
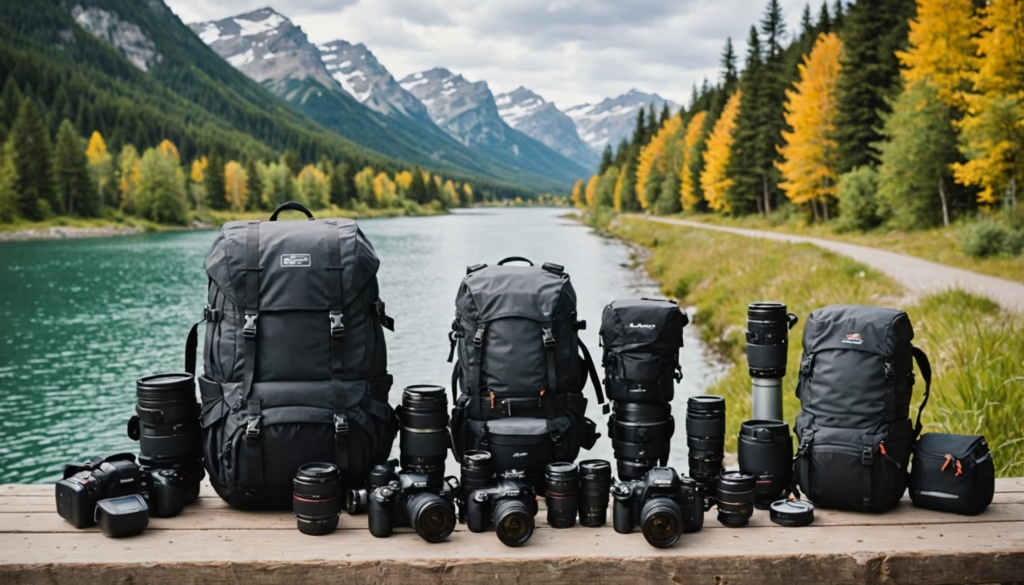
Select a bike-friendly backpack
Not all camera packs work well on two wheels. Look for these must-have features:
- Ventilated back panel to reduce sweat
- Padded, adjustable shoulder straps for stability
- Chest and waist straps to keep the load centered
- Dedicated camera compartment with customizable dividers
- External attachment points for tripod or helmet
- Water-resistant fabric or rain cover
If you want to adapt a hiking pack you already own, see our guide on how to adapt a hiking backpack into a camera backpack. And before you settle on a style, weigh the pros and cons of front-loading versus top-loading designs in our front-loading camera backpack roundup.
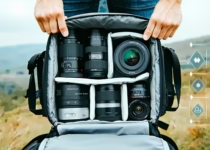
Cushion cameras and lenses
Bumps and vibrations are part of cycling, so padding is your best friend. Use padded dividers or wrap each body and lens in a soft pouch before placing it in the main compartment. Tips for maximum cushioning:
- Position heavier items at the bottom, closer to your spine
- Surround bodies with lenses or soft gear for an extra buffer
- Use lens caps and rear caps on every piece
- Fill empty spaces with socks or a small towel to prevent shifting
To understand why padding matters so much, read the role of padding in camera backpacks explained. With the right setup, your gear rides as smoothly as you do.
Arrange accessories smartly
Ever fumbled for that extra memory card mid-ride? Smart pockets and pouches keep you organized when every second counts. Try these hacks:
- Store cables and chargers in labeled zip pockets (see organizing cables and chargers in a camera backpack)
- Use a slim filter wallet or magnetic strip for filters (learn creative ways to store filters in a camera backpack)
- Keep cleaning tools in an easy-reach side pocket
- Place your card wallet near the top so swapping is quick
Breaking your accessories into modules (cables in one pouch, batteries in another) turns chaos into calm. You’ll thank yourself when the light is just right and you’re not digging for your ND filter.
Distribute weight evenly
A lopsided pack can lead to sore shoulders and an off-balance ride. Aim for a weight balance between your torso and hips. Here’s a quick guideline:
| Item type | % of total gear weight |
|---|---|
| Camera bodies + lenses | 40 |
| Tripod or gimbal | 15 |
| Accessories (cards, cables, filters) | 20 |
| Hydration + snacks | 15 |
| Layers + rain gear | 10 |
For a deeper dive into load balancing, check out how to distribute weight between camera gear and personal items. Adjust based on your body type and ride length, then tighten those straps.
Attach gear externally
Don’t let bulky tripods or gimbals eat up precious interior space. Here’s how to secure them:
- Use side straps or dedicated tripod loops (see tips for carrying multiple tripods with a backpack)
- Stow a compact gimbal in a lower compression strap (learn how to safely carry a gimbal in a camera backpack)
- Clip quick-release mounts on MOLLE or webbing
- Tuck straps under compression belts to avoid snagging
Fastening gear outside frees interior room for delicate bodies and lenses, so your pack stays neat and balanced.
Prepare for the weather
Rain, fog, and condensation can ruin a shoot. Here’s your waterproof playbook:
- Pack a roll-top dry bag or dedicated rain cover
- Seal camera bodies in ziplock or waterproof cases during heavy downpours
- Carry silica gel packets in lens pouches to absorb moisture
- Ventilate your pack when you stop to ride out condensation (see how to prevent condensation inside camera backpacks)
- Use waterproof zippers or cover flaps
With rain gear close at hand, you’ll stay shooting-ready, even when the sky opens up.
Pack snacks and water
Fuel and hydration are key on long tours, but spillage can damage gear. Follow these tips:
- Keep water bottles in side bike cages or insulated hip-belt pockets
- Use spill-proof containers or a hydration bladder in a separate pouch
- Store snacks in sealed bags to avoid crumbs in your main compartment (learn how to pack snacks and water in a camera backpack safely)
- Clean up spills right away to prevent sticky lens caps
This setup keeps you powered up without risking a chocolate smear on your glass.
Plan for quick access
When the light changes fast, you need agile access to your camera. Try these strategies:
- Assign a side pocket for your go-to body and lens combo
- Use a sling-style sling strap or quick-release belt holster
- Keep your most-used lens in a top-loading compartment (see how to organize a camera backpack for fast access shooting)
- Pre-set your camera settings so you can grab and go
With your primary gear at your fingertips, you’ll never miss that golden hour shot.
FAQs:
What backpack features suit cycling tours best?
Look for a ventilated back panel, secure straps, and a dedicated camera compartment that stays centered when you ride.
How many lenses should I carry on a cycling trip?
Stick to two or three versatile lenses—a wide-angle for landscapes and a mid-range zoom for flexibility keeps weight down.
How do I prevent condensation inside my pack?
Include silica gel packets, ventilate after sudden temperature changes, and pack gear in ziplock bags to block moisture.
Can I use a hiking hydration pack for cameras?
Yes, if you adapt the interior with padded dividers, as shown in our guide on adapting a hiking backpack.
What’s the safest way to carry a tripod on my bike?
Secure it with side compression straps or a quick-release tripod loop so it rests flat and balanced against the pack.
Should I carry spare batteries or a power bank?
Both, ideally. Pack batteries in a padded pouch and stash a power bank in an easily reachable pocket for quick recharges.
How can I keep my pack from slipping when I ride?
Tighten the chest and waist straps, and consider anti-slip strap pads or grippy liners to stabilize the shoulder straps.
Conclusion:
In just a few steps, you can transform your camera backpack into a two-wheeled studio on the go. With thoughtful packing, balanced weight, and weather-proofing, you’ll focus on the ride and the shot, not worrying about your gear. Get out there, enjoy the journey, and capture unforgettable moments—one pedal at a time.