Tips For Carrying Multiple Tripods With A Backpack
Plan tripod arrangement
Packing multiple tripods into your camera backpack starts with a bit of planning. You want to avoid that moment of “where do I even start” panic at the airport. First, let’s run through some basic choices so you can slot each tripod into its best spot.
Choose tripod types
Not all tripods are created equal. You’ll typically juggle:
- Travel tripods: compact, fold down small, perfect for tight spaces
- Full-size tripods: sturdy, heavy, ideal for studio or stable shots
- Monopod-tripod hybrids: flexible legs that convert on the go
Knowing which tripods you own helps you pick the order and straps you’ll need. Got a carbon fiber travel tripod? That one gets prime real estate near your back panel. The heavier, full-size unit can live closer to your hips.
Assess frequency of use
Ask yourself, which tripod will you grab most often? If you’re hopping between urban rooftops, your compact travel model should sit at the top or side. Reserve the bottom straps for gear you only break out occasionally. A quick-access setup saves time and keeps frustration at bay when the light is golden.
Use attachment points
Your backpack likely has dedicated loops, straps, or hoops designed for tripods. Let’s put them to work so everything stays snug and secure.
Side straps and loops
Most camera packs feature adjustable side straps. Slide your tripod legs into those loops, tighten the buckles, and your unit stays flush against the pack. That clears up your hands and stops the tripod from swaying when you walk.
Bottom straps
If side real estate is full, the bottom straps are a handy backup. Strap your tripod horizontally across the base, tighten each clip, and you’ve freed the sides for other kit. It’s less accessible, but perfect for backup tripods you don’t need mid-shoot.
| Attachment type | Pros | Cons |
|---|---|---|
| Side straps | Quick access, keeps pack narrow | May have block side pockets |
| Bottom straps | Free sides for other gear | Harder to reach without unpacking |
| Front loops | Super fast grab-and-go | Exposes the tripod to the weather |
Prioritize heavier tripods
Ever feel like your shoulders are pulling you backward? That’s often a sign your pack isn’t balanced. Let’s talk weight.
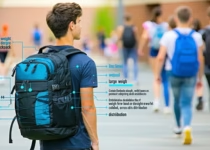
Weight distribution basics
Aim to keep your center of gravity close to your back. The heavier tripod should sit high and tight. Lighter tripods can live lower or on the periphery. When you distribute weight evenly, you’ll notice less strain on your shoulders and lower back. For extra detail on balancing items inside, check out how to distribute weight between camera gear and personal items.
Balance front and back
If you’ve got pockets or a front pouch, consider stashing one of your lighter tripods there. A front-back balance prevents that backward tug. And hey, less shoulder pain? Who wouldn’t love that. You can find more shoulder-saving tips in our guide on how to avoid shoulder pain from heavy camera backpacks.
Protect tripod legs
Tripod legs can get scratched, bent or dirty. Let’s keep them in pristine shape.
Wrap with protective sleeves
Many manufacturers include neoprene or padded sleeves. Slide each tripod in its sleeve, then clip it down. If yours didn’t come with one, cheap neoprene wraps from a dive shop work wonders. They also help dampen rattling.
Use tripod pouches
Tripod pouches often tie or clip onto your pack. They let you stash legs inside a weather-resistant bag before attaching to straps. You’ll keep grit, moisture, and accidental bumps at bay.
Consider alternative tripods
Sometimes carrying three full tripods isn’t ideal. Here are a few alternatives that pack more easily.
Compact travel tripods
These fold super small, weighing around 2–3 pounds. You get a similar height with telescoping legs. Many include dedicated folding patterns so they clip neatly to any pack.
Lightweight carbon fiber options
Carbon fiber tripods cost more but slash weight by up to 40 percent. They resist corrosion and vibrations better than aluminum. If you’re trekking long distances, that weight saving adds up.
Optimize your backpack
Your camera backpack may hide features that make tripod carrying a breeze. Let’s unlock them.
Hidden features to use
Dive into any secret loops, daisy chains, or side cinches. These often go unnoticed but are gold when hauling multiple stands. Need help spotting each one? Try this guide on hidden features to look for in camera backpacks for a quick walkthrough.
Front-loading vs top-loading
Front-loading packs let you open the entire camera compartment like a clamshell. You can rearrange tripods on the fly without shifting your back. Top-loading is simpler but can force you to unpack other gear just to get to a tripod. If you’re debating which style suits you, check the pros and cons of front-loading camera backpacks.
Practice loading routines
A smooth routine turns packing into second nature. Let’s lock down your pre-shoot ritual.
Pre-packing checklist
- Inspect tripod locks and leg hinges
- Stow any loose parts (bubble levels, feet adapters)
- Secure padded sleeves or pouches around legs
- Tighten backpack straps to avoid shifting
- Zip weather flaps over external straps
This little checklist prevents last-minute surprises when you’re rushing out the door.
Quick access setup
Want faster tripod grabs? Designate one side for your go-to tripod and another for backups. Load in the same order every time. Muscle memory kicks in and you’ll be clinking free in record time.
FAQs
How many tripods can I carry in a standard camera backpack?
It depends on your pack’s loops and strap capacity. Most standard camera backpacks handle two tripods comfortably. With clever side and bottom attachment, you might squeeze in a third.
Will carrying two tripods make my backpack too heavy?
It can add a lot of weight. Aim to use travel-friendly tripods or carbon fiber models. Spread the weight evenly and use padded straps to reduce strain.
How do I prevent tripod damage when traveling?
Wrap each tripod in a neoprene or padded sleeve. Use weatherproof pouches to shield against rain and grit. Secure straps tightly so the legs can’t rattle.
Can I use a hiking backpack for multiple tripods?
Yes, if it has adjustable side straps, loops, or daisy chains. You might check how to adapt a hiking backpack into a camera backpack for tips on reinforced frames and padding.
Which backpack straps work best for tripods?
Look for wide, adjustable straps with quick-release clips. Side compression straps near the bottom also help holdthe tripod feet steady.
Should I loosen tripod straps before packing?
Always tighten straps fully. Loose straps let legs bounce around, which can scratch your tripod or other gear.
How do I adjust the straps for different tripod sizes?
Most straps and loops are adjustable. Slide the tripod into place, snuggle it close, then tug on the buckle tails until there’s zero wiggle.
Conclusion
Carrying multiple tripods in a backpack doesn’t have to be a circus act. With a little planning, smart use of attachment points, and protective gear, you’ll pack like a pro. Give these tips for carrying multiple tripods with a backpack a try on your next shoot and notice how much smoother your setup becomes. Got a unique tripod-packing trick? Drop it in the comments so everyone can shoot smarter together.