Weatherproofing Tips For Your Camera Backpack
Picture this: you outfit your pack before sunrise, hoping to catch the golden hour. Just as you reach the overlook, clouds roll in.
Suddenly, that gentle drizzle turns into a downpour. If your gear isn’t protected, you could end up with a wet camera and ruined shots.
In this guide, we’ll share weatherproofing tips for your camera backpack, so you can keep your equipment dry and ready for the perfect shot. You’ll learn how to choose the right shell, add protection layers, safeguard individual items, and pack smarter for harsh conditions.
Why Weatherproofing Matters
Your camera gear is an investment. Water, dust, and humidity can damage lenses, sensors, and electronics.
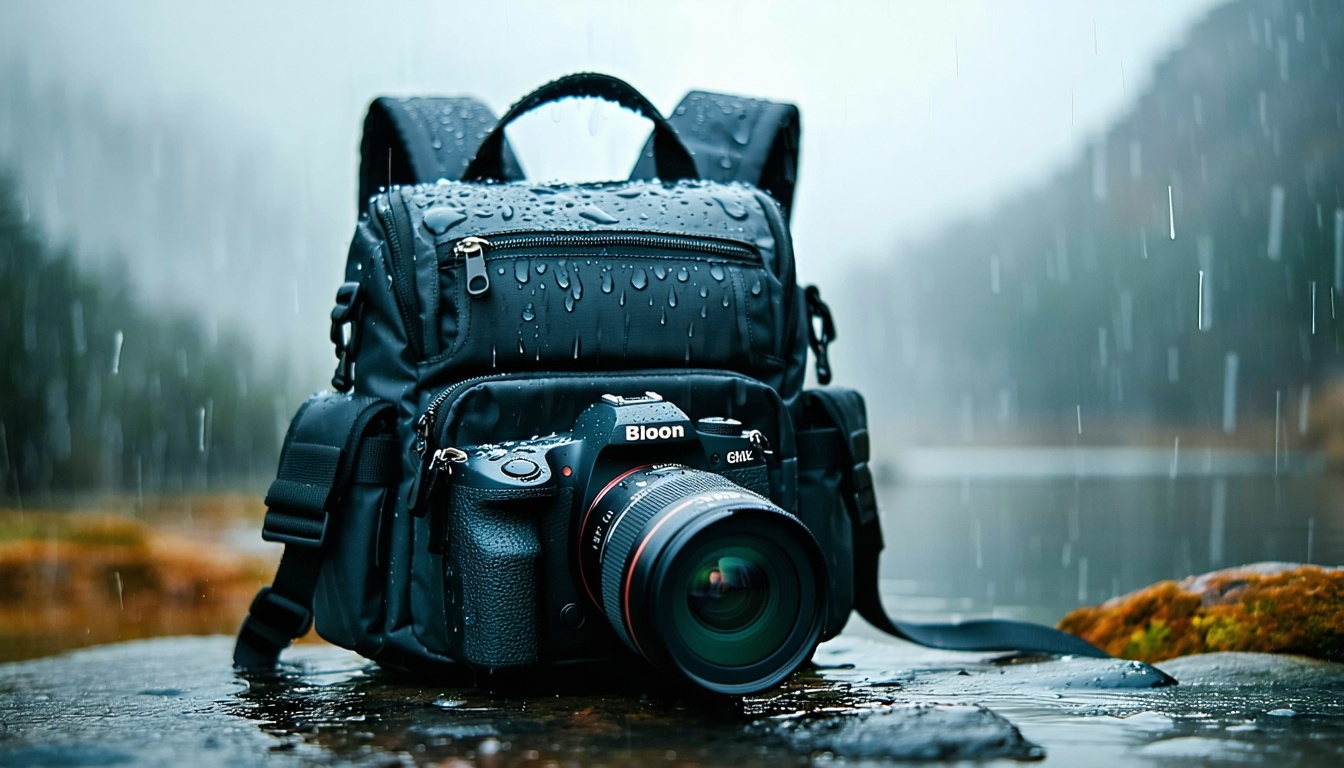
Want to avoid a soaked sensor in the middle of a shoot? A weatherproof camera backpack acts like a shield, letting you focus on composition instead of cleanup.
Even a brief splash can lead to internal corrosion, void warranties, and demand expensive repairs.
Common slip-ups:
- Walking under a tree canopy in light rain
- Climbing wet rocks without cover
- Leaving your pack on a car roof in the drizzle
Choosing A Weatherproof Shell
Start with a backpack designed to keep moisture out. Look for water-repellent fabrics, sealed seams, and zippers made for wet conditions. These built-in features create your first line of defense.
Built-In Rain Covers
Some camera packs include a rain cover that lives in a hidden pocket. When clouds gather, you pull it over your bag like a shield. This quick layer stops water before it seeps into fabric.
Waterproof Zippers And Seams
Zippers are the sneakiest entry point for water. Seek out weatherproof zippers with rubberized flaps or welded seams, and consult what to look for in a waterproof camera backpack for extra tips. Properly sealed seams also prevent leaks along panel joins.
Water-Repellent Fabrics
One easy defense is a bag built from water-repellent fabrics. These materials force water to bead up and roll off before soaking in.
- DWR-treated nylon for lightweight durability
- TPU-coated polyester for full waterproofing
- Waxed canvas for classic look and rugged feel
Choose a material that balances weight, durability, and budget.
Roll-Top Closures
Roll-top closures let you fold away excess fabric, sealing out water completely. Unlike zippers, they leave no linear entry points. Just roll down the opening twice, clip it shut, and you’re sealed.
Applying Additional Protection
Here’s the thing, even a weatherproof shell isn’t 100%. Adding extra layers seals out moisture, dust, and sand. You’ll sleep easier knowing everything stays dry.
Essential extras for harsh shoots:
- Rain cover or pack hood
- Dry bag or pack liner
- Waterproof pouches for cables and batteries
- Water-repellent spray
- Silica gel or desiccant packs
Using Rain Covers And Dry Bags
Oversized rain covers slide over your entire pack, while dry bags seal gear inside. Slip your camera backpack into a larger dry bag if you expect a serious downpour. These items cost less than a new lens, and they pack small.
Waterproof Inserts
Removable pack liners or waterproof inserts give you an extra barrier against leaks. They fit inside your main compartment, sealing gear when closed. For a snug, waterproof fit, see how to customize a camera backpack with inserts.
Utilizing Silica Gel Packs
Silica gel packs are cheap moisture magnets. Toss a few inside pockets to absorb residual humidity. Swap them out after a couple of shoots to keep them effective.
Comparing Protection Options
Use this table to pick the right layer for your next adventure
| Protection Method | Pros | Cons |
|---|---|---|
| Built-In Rain Cover | Always accessible, custom fit | Bulky when unused |
| Dry Bag | Affordable, seals completely | Extra gear to carry |
| Waterproof Insert | Lightweight, hidden inside | Must remove to access gear |
| Water-Repellent Spray | Easy to apply to any fabric | Needs frequent reapplication |
Protecting Individual Gear
Even if your backpack stays dry, moisture can sneak into pockets and separators. Treat each lens, camera body, and fragile accessory like a mini package that needs its own armor.
Sealing Lenses And Bodies
Stash lenses in padded, zippered pouches that repel water. Use lens caps and rear caps at all times. For bodies, consider neoprene camera wraps before dropping them into the main compartment.
Storing Memory Cards Safely
Memory cards are small but irreplaceable. Keep them in waterproof cases or sealed envelopes inside a zipper pocket, and head to the safest way to store memory cards in a backpack for extra tips. That way, even if water breaches the main compartment, your shots stay secure.
Protecting Batteries And Cables
Spare batteries and cables can rust or short if wet. Keep them in ziplock bags or dedicated waterproof pouches. Label each bag for quick identification in low light.
Maintaining Your Backpack
Regular care extends your backpack’s weatherproof performance. A quick rinse today means no permanent stains or mold tomorrow.
Cleaning After Exposure
After a muddy trek or sandy beach shoot, knock off loose dirt with a soft brush. Wipe wet spots with a damp cloth, then air dry your pack inside out. For a detailed step-by-step guide, check how to clean and maintain a camera backpack.
Reapplying Water-Repellent Treatments
Fabric coatings wear off after heavy use. Every few months, mist or spray your bag with a silicone-based water-repellent product. Let it dry completely before packing gear.
Inspecting Zippers And Seams
Regularly slide zippers back and forth to clear dirt. Feel for snags that might tear the seal. Use a silicone-based lubricant to keep them smooth.
Packing For Harsh Conditions
How you pack can make or break your shoot in tough weather. Spread weight evenly, lock down bulky gear, and keep essentials at hand.
Balancing Weight
Place heavy items close to your back to improve stability. Distribute weight side to side for comfort, and see how to balance weight in a camera backpack for more details. If you find yourself leaning forward, lighten the front pockets.
Securing Tripod
A loose tripod can wobble and catch rainwater. Use dedicated straps or side loops to cinch it tight, and see how to carry a tripod using a camera backpack for tips. For quick detachment, try side-access pockets instead of external clips.
Organizing Lenses
Store lenses upright in individual compartments to avoid water pooling in the glass. Use padded dividers and clear pockets for small filters. For more lens hacks, see the best ways to organize lenses inside a camera backpack.
Keeping Essentials Accessible
Store rain covers, lens cloths, and snacks in quick-access pockets. Use a side or top entry for minimal fuss when conditions change. Label pockets with colored tags to find items fast.
Frequently Asked Questions:
Can I Use A Plastic Bag As A Rain Cover?
You can in a pinch, but plastic bags tear easily and don’t offer a snug fit. Instead, invest in a pack-specific rain cover designed to stretch over your backpack.
How Often Should I Reapply Water-Repellent Spray?
Reapply your spray every 3 to 6 months, or after heavy exposure to rain or mud. If water stops beading on the fabric, it’s time for another coat.
Will A Rain Cover Protect Against Sand?
Rain covers block water but may let fine sand through the seams. For sandy environments, use a combination of sealable dry bags and pack liners to keep grit out.
Are Waterproof Inserts Worth It?
Yes, waterproof inserts offer a reliable secondary barrier without adding much bulk. They’re especially handy if you switch between backpacks frequently.
How Do I Dry Out A Wet Backpack?
Shake out any debris, unzip all compartments, and hang your pack upside down in a well-ventilated spot. Let it air dry fully before storing to prevent mold.
Can I Store Gear While It’s Damp?
Avoid storing damp gear or it could develop mildew or rust. If you can’t use your pack right away, remove all equipment and let it dry separately.
Conclusion
Weatherproofing your camera bag boils down to picking a solid shell, adding extra barriers, and sealing up individual items. With the right rain covers, waterproof inserts, routine maintenance, and smart packing habits, you create a dry home for your gear in any climate.
Now you have a clear playbook for keeping your camera backpack dry in rain, sand, or snow. Get out there, shoot confidently, and let weatherproofing tips for your camera backpack keep your gear safe and sound.
Packing Hacks For Frequent Flyers To Speed Up Security
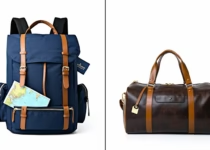
Weekender Backpacks Vs Duffel Bags: Which Is Better For Short Trips?