Best Ways To Organize Lenses Inside A Camera Backpack
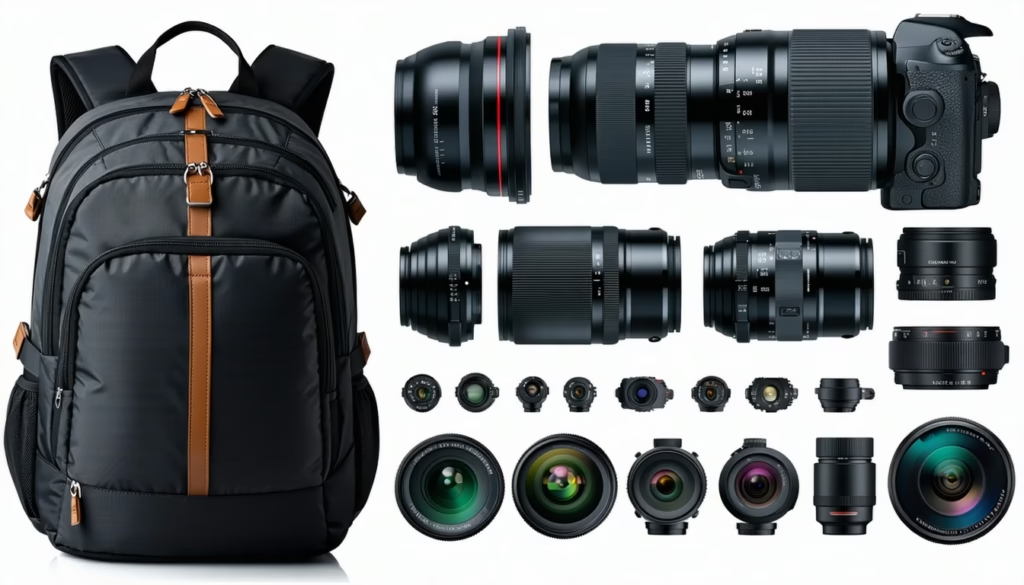
When you’re staring at a jumble of lenses in your camera backpack, you know the pain of fumbling for the right glass. In this guide, we’ll walk through the best ways to organize lenses inside a camera backpack so you can stash each piece of gear safely and grab it in a flash. By the end, you’ll have a system that keeps your primes, zooms, and macros lined up, protected, and ready to shoot.
You’ll learn to size up your lens arsenal, pick the right dividers and pouches, optimize your pack layout, and maintain scratch-free, dust-free glass wherever you roam. Let’s dive in.
Assess Your Lens Gear
Before you start shoving lenses into pockets, take a moment to survey what you’ve got. A clear count and grouping make the rest of this process a breeze.
Categorize by Frequency
Which lenses do you reach for most often?
- Everyday zooms (24–70mm, 18–55mm) usually earn a front-row slot.
- Specialized glass (macro, ultra wide) can go deeper in the pack.
- Rarely used or backup lenses can ride in an external pouch or at the bottom.
Ever fumble for the right lens while shooting? Grouping by how often you swap glass cuts down on guesswork when a decisive moment hits.
Group by Size and Type
Your 70–200mm telephoto deserves different treatment than a compact 50mm prime. Sort lenses into:
- Small primes under 3 inches long
- Medium zooms and primes with hoods attached
- Large telephotos and specialty optics
Lining similar-sized pieces together makes it easier to pick a divider setup that fits snugly around each barrel without wasted gaps.
Use Modular Dividers
Most camera backpacks come with padded dividers, but they don’t all play nicely with every lens lineup. Modular dividers give you the power to adapt on the fly.
Benefits of Modular Dividers
- Customizable fit for odd shapes
- Easy to reconfigure when gear swaps out
- Extra padding shields against bumps
Many of the best camera backpacks with modular dividers let you pop these panels in or out so you can carve compartments that mirror your gear’s footprint.
Customizing with Inserts
If your pack lacks dividers, you can add third-party inserts. Check out how to customize a camera backpack with inserts for DIY solutions. You might use:
- Thick foam liners cut to match lens barrels
- Velcro panels you can fold into sleeves
- Molded shells that cradle your most valuable glass
Divider Placement Tips
- Set dividers tight against larger lenses to avoid shifting.
- Leave a slim buffer around delicate front elements to slip in lens caps.
- Reserve a row of narrow slots for compact primes or filters.
Want to avoid lenses knocking together at the bottom of your pack? A well-mapped divider grid is your answer.
Protect Lenses Properly
Beyond organization, your lenses need padding and isolation to survive travel, hikes, or crowded events.
Padded Lens Cases
Individual hard or soft cases add a shock-absorbing layer. Compare your options in this quick table:
| Protection Method | Pros | Cons |
|---|---|---|
| Padded Lens Case | Maximum cushioning, stackable | Bulky, eats up space |
| Lens Wrap | Lightweight, compact | Less padding, no walls |
| Hard Shell | Rigid barrier against crushing or spills | Heavier, more expensive |
Pair a padded case with your pack’s dividers for double protection. For more general gear care, see how to protect your dslr gear in a backpack.
Lens Caps and Wraps
Never underestimate a snug lens cap or a neoprene wrap. Caps stop dust and scratches on the front element, while wraps cushion minor shocks. Keep extras in a side pocket so you’re never without a cover.
Smart Filter Storage
Filters often ride with lenses but can scratch glass if they rub together. Use a slim filter wallet or dedicate one tight slot per filter. If you swap often, label each sleeve with the filter strength or type for quick grabs.
How do you keep a valuable prime from bouncing around? A combination of wrap, cap, and rigid divider is the key.
Optimize Backpack Layout
A well-organized backpack is as much about the overall layout as about individual pockets. Let’s fine-tune the flow.
Choosing Access Style
Do you prefer top-load or side-load?
- Top-loading lets you peek in at everything at once.
- Side-loading offers quick-draw panels on the go.
Test both styles next time you shop, or see best camera backpack layouts for fast access to find packs tailored to your style.
Position Heaviest Items
Place your bulkiest zooms or telephotos close to your spine. That keeps the center of gravity stable and reduces strain. Lighter primes can go toward the pack’s outer edge.
Balance Weight Distribution
A lopsided pack makes you adjust your posture every step. Keep weight centered by:
- Stacking similar weights on each side
- Filling voids with lens pouches or cleaning kits
- Shifting straps and belts to snug up loose space
If you need deeper tips, check out how to balance weight in a camera backpack.
Keep Lenses Scratch-Free
Even minor abrasions can ruin a lens coating. A few simple habits go a long way to avoid that dreaded scrape.
Use Soft Lens Pouches
Slipping each lens into a soft pouch creates friction-free protection. For everyday carries, stock a set of micro-fleece pouches. If you’re worried about dust and scuffs, see our tips for keeping lenses scratch-free inside a backpack.
Prevent Direct Contact
Never stack lenses bare against one another. Even with dividers, minor vibration can lead to edge-to-edge contact. Always keep at least one layer—pouch, wrap, or cap—between barrels.
Quick-Access Pockets
Designate a small zipped pocket for your current lens. That way you can swap in clean glass without disturbing the rest of your setup.
Got that nagging worry about scratches on your glass? A pouch plus divider buffer handles it.
Maintain Lens Readiness
Organization isn’t just about stowing gear—it’s about having the right lens at your fingertips when the moment arrives.
Quick-Draw Techniques
Keep your most-used lens in an easy-reach slot. Practice drawing and swapping to build muscle memory. Some pros even clip a lens pouch to a belt loop for on-the-fly swaps.
Label and Color Code
Wrap a bit of brightly colored tape around each lens cap. You’ll instantly spot your 85mm prime among a sea of black barrels. Consider jotting focal lengths on removable labels for absolute clarity.
Store Cards and Accessories
While lenses are front and center, don’t forget memory cards, batteries, and filters. A small internal pocket or a memory card safe keeps these essentials organized and never misplaced.
Imagine grabbing the perfect lens without fumbling through pockets—labeling and practice turn that dream into reality.
Frequently Asked Questions
How Often Should I Clean Divider Panels?
Aim to wipe down your dividers every few months or after particularly dusty shoots. Use a damp microfiber cloth and mild soap, then air dry fully before reinstalling. Clean panels keep dirt from transferring to your lenses.
Can I Use Regular Backpack Dividers?
You can, but they often lack the padding and customization that camera-specific dividers offer. For a snug fit, consider third-party kits or look at camera backpacks with modular dividers.
What’s the Best Way to Carry Lens Hoods?
Store hoods on the lens in reverse (petal forward) to save space, or snap them together outside the lens. Some lens pouches have extras slots just for hoods—you might find that option in camera backpacks with quick-access side doors.
How Do I Avoid Lens Creep Inside Dividers?
Use a small piece of Velcro or a padded wrap around the base of the lens to secure it to the divider wall. That stops slow sliding when you tilt your pack.
Are Hard Cases Better Than Soft Pouches?
Hard cases offer rigid protection against crushing, but they’re heavier and take more room. Soft pouches plus a padded divider often hit the sweet spot for most shooters.
Conclusion
A well-organized lens setup transforms your camera backpack from a gear dungeon into an efficient, protective kit. By assessing your collection, using modular dividers, protecting each piece, optimizing layout, and keeping glass scratch-free, you’ll be ready for any shoot.
Give these techniques a try on your next outing. A little planning up front saves you time, stress, and costly lens repairs down the line. Happy shooting!

Waterproof vs Canvas vs Leather: Which Material Should Dads Choose?
Making School Backpacks Pet-Safe (For Students With Allergy Pets)