How To Clean And Maintain A Camera Backpack
Why Backpack Care Matters
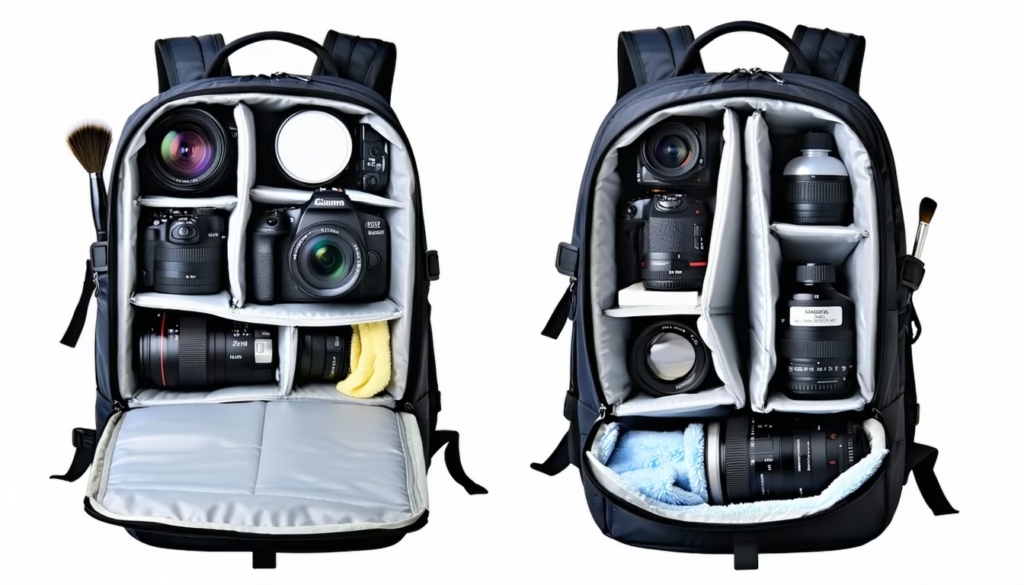
You rely on your camera backpack to keep priceless gear safe, organized, and ready for action. Dirt, dust, and moisture can sneak into zippers and seams, leading to scuffs, mold, or even gear damage. By learning how to clean and maintain a camera backpack, you not only protect lenses and bodies, you also extend the life of your pack. A well-cared-for bag stays water resistant, keeps straps working smoothly, and looks sharp on the trail or in the studio.
Here’s the thing: a quick wipe or vacuum session takes just a few minutes, but it saves you headaches—and money—down the road. Plus, nothing beats the confidence of hauling gear in a clean, organized backpack when you’re shooting that once-in-a-lifetime shot. Ready to get started?
Gather Cleaning Supplies
Before you dive in, gather your toolkit. Having the right supplies at hand makes the whole process faster and more effective.
- Soft brush or lint roller to remove loose dirt
- Mild soap (like dish detergent) or technical fabric cleaner
- Microfiber cloths for gentle wiping
- Small vacuum or handheld blower for interior crevices
- Bucket of lukewarm water
- Toothbrush or a small nylon brush for stains
- Silicone-based zipper lubricant or beeswax bar
- Towels or absorbent cloths for drying
Keep any harsh chemicals or bleach far away from your pack. You want to preserve waterproof coatings and fabric integrity. If your backpack has removable dividers or rain cover, pop them off now. We’ll tackle those separately.
Empty And Inspect Backpack
Start with a totally empty bag. Yep, every lens, body, memory card, and tripod strap needs to come out. Take a moment to check every pocket and flap.
- Lay out gear on a clean surface
- Remove foam inserts and dividers, set aside
- Shake or tap the pack gently to dislodge crumbs
- Unzip every compartment, flap open all pockets
While the backpack is empty, inspect it for damage. Look for loose stitching, tears, or weak seams. If you spot any frayed straps or broken buckles, now’s the time to repair or reinforce them. For tips on securing delicate gear after cleaning, check out the safest way to store memory cards in a backpack (/the-safest-way-to-store-memory-cards-in-a-backpack).
Clean The Exterior
Your backpack’s outer shell takes the brunt of every adventure. Whether it’s canvas, nylon, or polyester, dirt and spills need gentle attention.
- Brush off dust with a soft brush or lint roller
- Mix a small amount of mild soap with lukewarm water
- Dip a microfiber cloth in soapy water and wring well
- Wipe panels, seams, and straps, rinsing the cloth often
- Use a toothbrush to scrub stubborn spots or scuffs
Pay extra attention to the bottom of the pack, where mud and grit collect. Rinse soap residue with a clean, damp cloth. Never submerge the entire pack unless the manufacturer’s instructions explicitly allow it. Harsh soaking can break down waterproof coatings.
Clean The Interior
Your pack’s inside can accumulate sand, dust, and lens cap fuzz. A tidy interior not only looks better, it prevents scratches and jams.
- Vacuum or blow out loose particles with a small handheld device
- Spot-clean fabric liners using the same mild soap solution
- Wipe down removable dividers, then rinse in clean water
- Lay foam inserts flat on towels and gently pat with a damp cloth
- Give pockets a quick brush to dislodge hidden debris
Once everything’s clean, let each piece air dry fully before reassembling. If you store extra lens caps or cables inside pockets, take them out and rinse the cloth pouches separately. For ideas on keeping compartments organized after cleaning, see the best ways to organize lenses inside a camera backpack (/best-ways-to-organize-lenses-inside-a-camera-backpack).
Dry And Air Out Backpack
Drying is as important as washing. Any lingering dampness leads to mold, odors, or fabric breakdown.
- Prop the backpack open in a well-ventilated area
- Hang or stand it upside down to let moisture drip out
- Place towels inside the main compartments to absorb water
- Rotate the pack every few hours until completely dry
Avoid direct sunlight or high heat from dryers. Those can fade colors or warp synthetic materials. If you’re in a humid climate, use a small fan to circulate air. Give removable dividers and rain cover the same treatment on a flat surface.
Treat Odors And Mold
Even a clean pack can pick up smells from sweat or damp gear. Here’s how to freshen things up and prevent mildew.
- Sprinkle baking soda inside, let sit overnight, then vacuum
- Wipe interior panels with a 50/50 mix of water and white vinegar
- Use fabric-safe odor removers or activated charcoal sachets
- Store silica gel packets inside pockets to absorb humidity
- If you spot mold, scrub gently with vinegar before cleaning as usual
Regular airing and occasional vinegar wipes will keep that fresh-out-of-the-box vibe. For advanced waterproofing and mold prevention, check weatherproofing tips for your camera backpack (/weatherproofing-tips-for-your-camera-backpack).
Maintain Zippers And Hardware
Zippers, buckles, and clips demand a bit of love to keep working smoothly. Otherwise, you risk snagged straps or stuck compartments.
- Inspect zippers for grit, and use a soft brush to clear teeth
- Apply silicone-based zipper lubricant or rub beeswax bar along the track
- Test each zipper back and forth to distribute lubricant
- Tighten loose screws or rivets on buckles and clips
- Replace worn strap ends or webbing before they fail
Smooth-running hardware saves you from fumbling with stuck pockets on the go. It’s a quick step that pays off when you need gear in a hurry.
Store Your Backpack Properly
After cleaning and drying, store your camera carrier to retain its shape and prevent damage.
- Loosely reassemble dividers so foam isn’t compressed
- Clip all buckles and zip up the main compartments
- Hang the pack or place it upright on a shelf
- Keep it away from direct heat, sunlight, or damp basements
- Stuff a clean towel inside to maintain structure
Proper storage also lets you spot potential issues—like mildew spots or loose stitching—before your next shoot. Treat your pack as an investment rather than a to-do item.
Troubleshoot Common Issues
Even with regular maintenance, you may hit a snag. Here’s a quick reference table for common hiccups.
| Symptom | Cause | Fix |
|---|---|---|
| Stiff zippers | Dirt or dried lubricant | Clean teeth, reapply silicone zipper lubricant |
| Lingering musty odor | Trapped moisture or mold | Wipe with vinegar, dry thoroughly, and add a baking soda sachet |
| Faded exterior | Sun exposure, harsh detergents | Use UV-resistant spray, switch to a gentler cleaning solution |
| Loose stitching | Worn seams or heavy loads | Patch with fabric glue or reinforce with needle and thread |
| Scratched dividers | Gear shifting inside compartments | Add velcro strips or padding, rearrange inserts |
Refer back to earlier sections for step-by-step guidance on each fix. Consistent care keeps small problems from turning into backpack failures on location.
Frequently Asked Questions
How often should I clean my camera backpack?
Aim for a light cleaning every 3 to 6 months, or after particularly dusty or wet shoots. Give it a full wash when you notice stains or odors.
Can I machine wash my camera backpack?
Most packs are best hand-washed. Only machine wash if the manufacturer explicitly recommends it, and choose a gentle cycle in a laundry bag.
What’s the best way to dry my backpack?
Air dry in a shaded, well-ventilated spot. Hang or place upside down with towels inside to wick moisture, but avoid direct sunlight and heat sources.
How do I remove oil or grease stains?
Apply a mild dish soap directly to the stain, let it sit 10 to 15 minutes, then gently scrub with a soft brush and rinse with a damp cloth.
Is it safe to use bleach on interior liners?
No, bleach can weaken fabric fibers and ruin waterproof coatings. Stick to mild soap or a vinegar solution for odor removal.
Conclusion
A little elbow grease and regular checkups will keep your camera backpack in peak condition for years. By following these simple steps, you protect both your pack and the gear inside.
Next time you unpack for a shoot, you’ll enjoy a clean, fresh-smelling bag that’s ready to carry your camera bodies, lenses, and accessories wherever creativity takes you.
How To Pack Clothes Efficiently In A Clamshell Weekender

How To Pack Shoes Without Wasting Suitcase Space