How To Fix a Backpack Strap Adjuster

A painfully common inconvenience that all backpack owners face at least once in their lifetime (read month!) is their strap adjuster giving up at a crucial moment. At that time even the coolest dudes wished they knew how to fix a backpack strap adjuster.
Recognizing the problems that are faced by people daily we bring you, the ultimate guide to fixing that stubborn strap holder of yours in just a matter of few minutes. Ultimately saving you from a painful day of holding your strap in one hand or tedious trips to the store.
All you need is a few tools, 5 to 10 minutes of your day, and you’ll be ready to give that bag of yours a strong buddy to lift its weight. Depending on whether the adjuster has completely clipped or gotten loose, you can quickly replace it anytime anywhere.
You might interested in how to fix a zipper on a backpack without tools.
How to Identify the Broken Strap Adjuster:
Broken strap adjusters can be hugely problematic if they are not investigated with caution. Ideally, if you feel that your strap might break down or is causing problems, a good way to check is to look for any apparent faults that the adjuster might have. These could be either on the surface of the adjuster (most adjusters are made of plastic and thus easy to break) or their connection with the strap.
If no visible damage is seen but your doubts fail to go away, you can confirm possible damage by first adjusting the straps by moving the adjuster up and down. If the adjuster is broken, it will most probably be stuck on the strap, or its movement will have a lot more resistance than usual. It might also produce annoying screeching noises or tear the strap during its adjustments.
Finally, you can test the tension of the strap and see if the adjuster holds it. If by applying tension, the strap loosens or slips, chances are that your adjuster is near its end and needs replacement. It is better to immediately change the adjuster, however, if you don’t have a duplicate adjuster some DIY strengthening tips might also work.
Tools Needed to Fix a Backpack Strap Adjuster:
Although the tools that you will need might vary depending on the approach you are going to take, there are however some common tools that can facilitate your strap adjuster fixing in no time. And your problem of how to fix a backpack strap adjuster will be solved.
Scissors:
Scissors can come in handy if the strap is sewn together in many layers. In that case, the strap can simply be cut leaving a space of almost 8 mm (about 0.31 in) rather than rethreading all the layers of the bag.
Needle-nose pliers:
Pliers can be useful when you need to deal with miniature and small parts of the adjuster.
Adhesive tape:
Adhesive tapes are highly useful tools for sealing or strengthening a weak strap adjuster.
Superglue:
A sound alternative to adhesive tapes can be superglue which can do a better job of fixing the adjuster.
Needles/Sewing Kit:
A sewing kit is your ultimate survival tool if you need to replace the adjuster there and then.
Replacement Strap Adjuster:
Well, you can’t replace a strap adjuster without another adjuster, right? These are readily available at your local shops and can be bulk bought and kept in your home.
Now that you have the basic tools needed to fix a strap adjuster, the worrisome part is over. All you need is to learn how to fix a backpack strap adjuster of yours and you don’t have to worry about carrying a backpack with a broken strap anymore.
Steps of How to fix a backpack strap adjuster:
Since adjusters are of many types (ladder locks, sliders, cam locks, etc.) Recognizing your adjuster is the most important part. Nevertheless, they can be fixed by similar methods. As ladder lock adjusters are the most common, we will look at how to fix and replace a ladder lock adjuster.
Step 1: Strengthen the existing adjuster:
Usually, if you notice the malfunctioning of the adjuster quickly, it means that it’s not completely broken and is just about to be. At this point, if you don’t have a standby adjuster, you can use adhesive tapes to either completely cover the adjuster or just the parts that are about to break.
This might not be a permanent solution but will be an important first step if you’re outside as it can give you ample time to run to a store and buy a replacement adjuster.
Step 2: Rip out the thread or cut the webbing:
You have managed to get your bag through the last lives of your adjuster and were just in time to buy another one as your old buddy breaks into two. Now is a good time to remove it. The first thing for that is to free it from the strap.
You can do it by either ripping out the threads if only the strap is attached to the bag. However, if the threads are going down several layers into the bag, then maybe cutting out a part such that it can be sewn back together is a better idea.
Step 3: Remove the old broken strap:
Slowly pull the old adjuster out of the strap. If there are any hardwires that are keeping the adjuster in place, this is the point where you use your pliers and screwdriver to safely remove it.
Use sanitizing strips to clean the area where the adjuster is supposed to be placed so that it is disinfected before adding the new adjuster.
Step 4: Insert new adjuster:
Make sure that the new adjuster is oriented correctly, and slide it into the strap keeping its dentures towards the strap.
Step 5: Thread back the webbing:
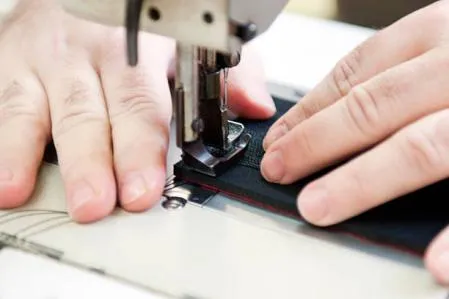
Once your adjuster is in place, use your sewing kit to lock back the strap webbing. You can use the synthetic thread to give more strength to the stitch and a normal thread to keep the open webbing from fraying. Don’t hesitate to put more stitches unless the material on the strap is in danger of being damaged.
Step 6: Adjust the length according to your requirement:
A little final adjustment using the buckle and voila! You’ve got a brand-new backpack strap adjuster at your own home. In this way, you can easily get the answer to how to fix a backpack strap adjuster. And you can use this brand new adjuster now.
Test and Cross Check the Backpack Strap Adjuster:

Replacing your adjuster is 80 percent of the task done, however, you’re not completely free of duty yet as the next important part is to check if the strap adjuster is fixed. A good way to test the new adjuster is to pull on the free end of the strap to make sure it is steady in place. If the new adjuster is wiggling or sliding down, it’s probably not fixed correctly.
Given these circumstances that the adjuster is not fixed properly, you will have to double-check whether you have installed it correctly and whether it has any malfunctioning parts. Tighten the hardware and use your tools to keep them properly aligned. If the problem persists, then try adjusting the strap again and repeating the process.
After you are done, it is important that you do your due to prevent your buckles from giving up. They should be properly checked and maintained regularly to prevent any mishandling and scratches, so you get a long-lasting strap adjuster.
Furthermore, you need to adjust the length of the strap in such a way that the backpack sits comfortably on your back going from your shoulders to your torso as it adjusts the weight of the bag evenly. Most importantly you need to limit the weight that you put in your bag to prevent excessive tension on the straps and the adjuster. Sometimes adding sternum straps can also help as they distribute the weight pulling off the burden from the adjuster.
Conclusion:
With that being said, we believe by now you have become an expert on knowing how to fix a backpack strap adjuster no matter where you are and how it breaks down. With a few essential tools, you are good to go with your brand-new adjuster.
By following a few easy steps, you will easily be able to support your back fully and prevent your bag from tearing down. We have also explained the steps that you need to do in different conditions, I.e. whether your strap adjusters break down outside during your travels or at home.
With that much knowledge at hand, it is certain that fixing broken strap adjusters and taking care of your bag in a manner that it stays on longer will not be of many challenges to you. Tell us more about backpack strap adjuster hacks and how to fix a backpack strap adjuster.
FAQs:
How do you attach a backpack strap adjuster?
There are many ways to attach a backpack adjuster depending on its type, however, a general method is to first determine the direction it is to be attached to the strap, then pass the strap through the adjuster following the loops, and then safely secure it.
How do you fix an adjustable strap buckle?
An adjustable strap buckle can be fixed by first examining it thoroughly and recognizing the weak parts. Those parts then can be tightened and aligned properly to fix the adjuster.
How do you use a strap adjuster buckle?
A strap adjuster buckle is used to increase or decrease the length of your strap to accommodate it on your back. This is to ensure maximum support for both the backpack and your back.
How do you set up a strap adjuster?
To set up a strap adjuster, simply unstitch the strap from the webbing and keeping the orientation intact, add the adjuster. Follow it by aligning the parts properly and double-checking to fix it.
How do you fix a slip-on backpack strap?
A slip on the backpack strap can be fixed by first readjusting the buckle to its desired place, and then pulling down the strap while at the same time realigning and tightening the components of the slip. This ensures any adjuster slips are fixed.

How to Choose a Backpack That Works in All Weather Conditions

How to Pack Gear for Twins or Multiple Children