How To Dye a Backpack at Home

How to dye a backpack at home? Do you know the way you carry your belongings in your rucksack says a lot about who you are and what you value? Your backpack goes on many excursions with you, whether you’re a student, a traveler discovering new places, or a commuter working through everyday routines. But, the colors could fade with time, or you might just want something new. To your relief, a new bag is not always necessary to revitalize your style.
Is your backpack color getting lighter with every wash? Don’t worry, we will help you know how to dye your backpack at home.
This detailed tutorial will show you how to dye a rucksack the right way, so you can give your old favorite an update while still letting your creativity shine. Inexpensive and adaptable, this do-it-yourself project is perfect for anybody seeking to repurpose an old favorite, put their spin on a new buy, or just jazz up their everyday outfit.
When you dye your rucksack at home, you’re not just altering its look; you’re also giving it a personalized touch that reflects your personality. There is a vast array of colors to choose from, from daring shades to elegant neutrals that can enhance any outfit. Not only will your rucksack get a new look by following these procedures, but you’ll also give it personality and make it unique from others.
Get ready for a vibrant adventure by rolling up your sleeves, collecting your supplies, and setting off. Follow below mentioned steps and enjoy the process:
Step 1: Gather Your Materials:
It is essential to collect all the required supplies before beginning the dyeing procedure. Gather the following items:
One should have on hand a bag constructed from sustainable materials, such as cotton or canvas.
- Dye for fabric (choose a dye that works with the material of your backpack)
- A big plastic container
- Safety gloves made of rubber
- A spoon or a stick for stirring
- Warm water
- Gentle cleanser (not required)
- For fixing the color, you may optionally add vinegar.
- Protect your workspace with a plastic sheet or trash bags.
- Paper towels (for removing spillage)
For more information about the materials required to dye your backpack kindly visit this link.
Step 2: Prepare your Workspace:
Your best bet is to choose a spot with good air circulation, such as outside or a place with lots of windows. To safeguard your work surface from any spills and splatters, lay down a plastic sheet or use waste bags. Keep your work area tidy and clear of distractions.
Step 3: Prep Your Backpack:
It is essential to have your bag ready before dying. First things first, take off any fasteners that you would rather not color, such as straps or buckles. Wash your new bag with a gentle detergent to remove any manufacturing finishes that might prevent the color from soaking in. Older backpacks need a good cleaning to get rid of all the dirt and filth.
Step 4: Mix the Dye:
To make the dye mixture, refer to the package directions for the fabric dye. Following the dye’s directions, pour boiling water into a big plastic basin or bucket. After that, dissolve the fabric color by adding it and stirring. A little vinegar may help set the color if you’d like.
Step 5: Test the Color:
Do a little, hidden area test to see how the color looks before you dye the whole bag. Dip a small piece of cloth or a corner of a towel into the dye solution and see the resulting color. To get the hue you want, you may need to adjust the dye concentration.
Step 6: Dye Your Backpack:
Dye your rucksack when you’re happy with the color. Make sure the dye solution is uniformly saturated before submerging the rucksack. To make sure the color gets into the bag evenly, gently swirl it with a stirring stick.
Step 7: Set the Dye:
To set the color after dying, follow the directions on the fabric dye container. Typically, you need to run cold water over the bag until it becomes completely clear. The color may be set by soaking the rucksack in a vinegar and water mixture, as suggested.
Step 8: Rinse and Dry:
Rinse the bag completely with cold water once the color has set to remove any excess dye. Keep the bag out of direct sunlight and in a well-ventilated place to dry. Do not squeeze or wring the bag; doing so may cause it to lose its form.
Want to learn more about the drying process after dyeing? Follow the link and get your answer to Can I Put a Backpack In the Dryer?
Step 9: Reassemble Your Backpack:
Reattach the straps, buckles, and any other removable components of the backpack once it is totally dry. Before you go, double-check that your rucksack is completely assembled and that the color has dried evenly.
Step 10: Enjoy Your Newly Dyed Backpack:
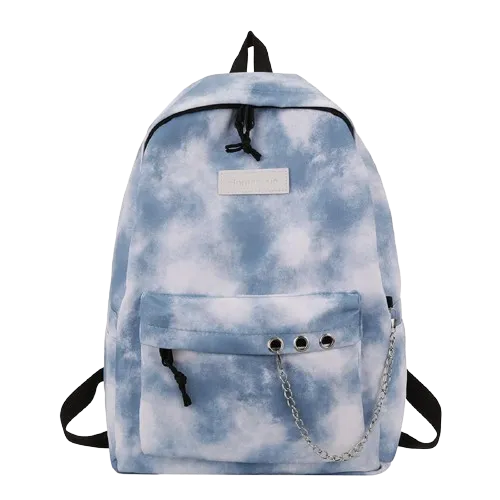
You have achieved a great feat! You’ve done it! Your home-dyed rucksack now has a whole new appearance. Take pride in your creation and use your one-of-a-kind item on your next journey. Also, check out How to Wash a Fjallraven backpack.
Conclusion:
Hopefully, the above-mentioned steps have helped you a lot with how to dye your backpack at home. You may add a touch of flair to your daily gear by dying your rucksack at home. It’s more than simply a DIY project—it’s a creative adventure. bit by bit, your rucksack will become a reflection of your personality.
Once the color sets, however, the procedure loses some of its charm. With your freshly painted rucksack as a backdrop, your creative energy and boundless imagination may shine through on all your trips. So, take advantage of the chance to express yourself via your accessories and allow your creativity to run wild as you give your rucksack a new lease of life.
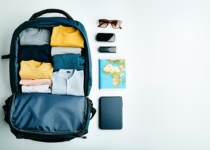
How To Pack For Long Trips with Minimal Luggage
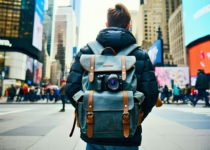
How To Use Camera Backpacks For Urban Photography

The team performed opportunity as well as operated like a well-oiled machine– exceptional!