How To Choose A Camera Backpack For Air Travel Rules
Flying with your camera gear often feels like a balancing act. You need a bag that fits airline carry-on size and weight limits, protects delicate lenses, and stays comfortable all day.
Ever tried jamming an oversized pack into the overhead bin only to face a stern gate agent? In this guide, let’s walk through how to choose a camera backpack for air travel rules step by step. By the end, you’ll pick a carry-on-friendly pack that keeps your kit safe and your shoulders happy.
Understand airline requirements
Unless you want to check your bag, you have to meet carry-on rules. Most airlines specify maximum dimensions and weight.
Size limits vary by carrier, so check your airline’s website before you shop. Typical dimensions hover around 22 x 14 x 9 inches, but some budget airlines cut that down.
Weight allowances usually range between 15 and 22 pounds for carry-on. Exceeding limits can mean extra fees or forced check-in.
Meet carry-on size limits
- Measure your empty backpack with all straps and pockets zipped.
- Compare your bag dimensions to your airline’s published limits.
- Add an inch or two of wiggle room for bulging pockets.
Follow weight allowances
- Weigh your loaded bag at home on a kitchen scale or luggage scale.
- If you’re close to the maximum, swap heavier lenses into a checked bag.
- Remember, your personal item also may have size or weight rules.
Know security screening
TSA and other security agencies require liquid rules and electronics screening. You’ll need a bag that can open flat or unzip wide.
Quick panel-access designs speed up laptop removal. Check for a dedicated laptop sleeve or a simple main compartment. This saves time at the checkpoint and reduces stress.
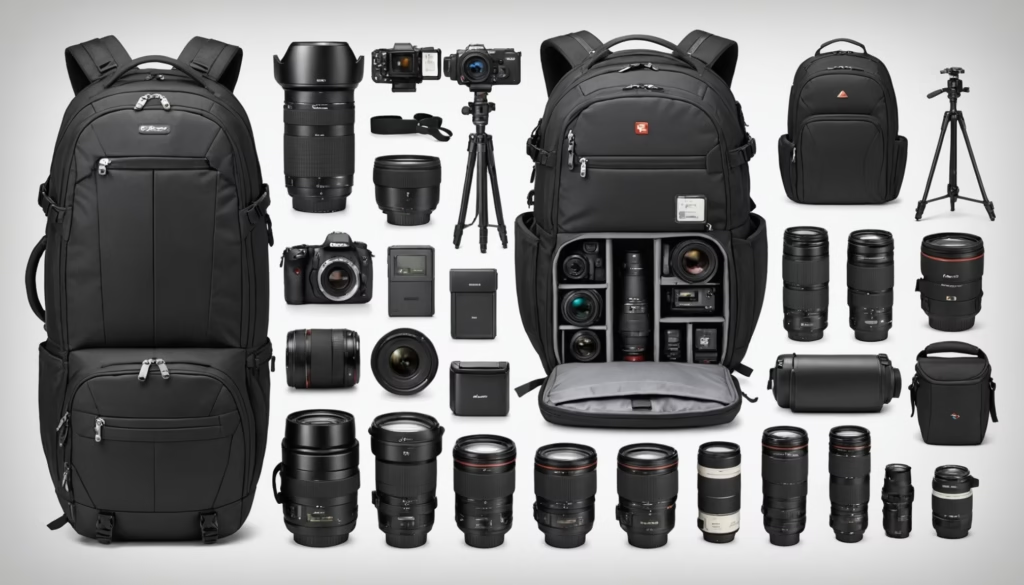
Inventory your camera kit
Before you buy, list every item you carry on trips. This helps you choose the right volume and layout. Include your camera bodies, prime and zoom lenses, flashes, filters, tripods, cables, batteries, and chargers.
List essential gear
- Camera body or bodies
- Lenses you use most often
- Backup batteries and charger
- Charger for small accessories, like flashes or microphones
Include accessories and tripods
If you travel with more than one tripod, look for side or bottom straps that handle multiple legs. You can explore tips for carrying multiple tripods with a backpack to see different strap setups. Gear that dangles or shifts can throw off your balance, so secure attachments tightly.
Assess backpack organization
A well organized pack keeps your lenses safe and your workflow fast. Look for padded dividers that you can move around. Make sure pockets can hold filters, memory cards, and cables without jumbling them together.
Choose modular dividers
- Pick bags with velcro dividers that let you customize each compartment.
- Position dividers to keep lenses upright and each piece separate.
- Adjust padding thickness to protect fragile gear.
Organize lenses and filters
Filters need flat, protected spots. You can follow creative ways to store filters in a camera backpack to tuck them into slim pockets or filter cases. Store each lens upright and separated by padding so they don’t bump together.
Manage cables and chargers
Loose cables tangle with gear. A small mesh pocket or dedicated pouch can contain chargers and cords. Wrap excess cable in velcro straps to keep things tidy.
Check design and material
Your pack’s layout and fabric can make or break your travel day. The wrong material can leak moisture or tear under strain. The wrong layout can slow you down when you swap lenses mid-journey.
Front, top, or panel access
Different access styles suit different shooting styles. Panel-access or “clamshell” bags open like a suitcase. Front-load designs let you zip open only one side. Top-load packs give you smaller flaps to peek inside.
| Style | Pros | Cons |
|---|---|---|
| Panel access | Full visibility, easy packing order | Heavier flap, slightly bulkier |
| Front load | Fast access to one compartment | Pack removal often required |
| Top load | Simple, often lighter design | Digging for bottom gear |
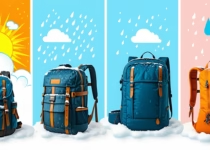
Weather resistance factor
Check if your bag uses water-resistant fabric or comes with a rain cover. If you often shoot outdoors, these features pay off. For rainy shoots, consider tips for using a camera backpack in rainy weather.
Tripod and accessory straps
Look for sturdy hooks or straps that lock tripod legs in place. Some packs have quick-release buckles that you adjust on the fly. If you haul multiple tripods, our previous link on tripods can help you choose the right fit.
Prioritize comfort features
A heavy camera pack can strain your back and shoulders. Plan for long walks through airports or rough terrain on location. Comfort features can make all the difference when you carry your kit for hours.
Supportive straps and hip belt
Thick, padded shoulder straps distribute the load better. A hip belt takes pressure off your shoulders.
Adjust both straps snugly but not tight. Try the pack on with weight before you buy.
Even weight distribution
Your camera and lenses are not all the same weight. Place heavier items close to your spine in the main compartment.
Lighter gear goes in outer pockets or top sections. This simple trick keeps you balanced and reduces back strain.
Enhance security measures
Crowded airports and terminals can magnify theft risks. Choose a pack with anti-theft features so you can stay focused on shooting, not your bag.
Lockable zippers and pockets
Built-in locking points on zippers allow you to add small padlocks. Use them on the main compartment and any external pockets that hold valuables.
Hidden compartments
Packs with secret pockets add another layer of protection. You can stash passports, memory cards, or a phone behind a false panel.
Anti-theft features
Look for slash-resistant straps and cut-resistant fabric. Some bags include RFID-blocking pockets to protect your credit cards. If security is a top concern, see how to protect camera gear from theft while traveling.
Pack and access gear
Even the best backpack can slow you down if you pack in random order. A consistent system lets you grab what you need quickly, without shuffling through everything.
Pack in the right order
Start with heavy items first, then fill gaps with smaller accessories. You can follow the best packing order for cameras and accessories to map out each layer. That guide shows you how to fit your kit snugly.
Keep essentials within reach
Stash your passport, boarding pass, and phone in a quick-access pocket. If you shoot street photos or need to swap lenses on the move, check out how to organize a camera backpack for fast access shooting.
Use a personal item
Most airlines let you carry one personal item plus a carry-on. If your backpack fits as a personal item, you gain extra space in your carry-on. You might pack filters, cables, or a drone controller in a small laptop sleeve.
Maintain your backpack
A well cared-for bag lasts longer and protects your gear. After each trip, give it a quick once-over to catch any damage or dirt.
Clean after each trip
Empty every pocket and shake out debris. Wipe the exterior with a damp cloth and mild soap. Let your pack air dry fully, especially if it got wet on the road.
Prevent condensation
Traveling through varied climates can lead to moisture buildup inside. Place silica gel packs in your camera compartment to absorb humidity. For more tips, see how to prevent condensation inside camera backpacks.
Fix slipping straps
Loose or worn strap padding can slide off your shoulders. If you notice consistent slipping, tighten adjustment straps and consider adding a strap clamp. You can get step-by-step help in how to prevent camera backpack straps from slipping.
FAQs
What is the ideal carry-on size for a camera backpack?
Most airlines allow bags up to 22 x 14 x 9 inches as a carry-on. Verify size rules on your carrier’s website. Remember to measure your fully loaded bag, including any protruding pockets.
Can I check my camera backpack instead of carrying it on?
You can, but checking adds risk. Your kit may face rough handling or theft. If you must check, use a hard case or padded inserts and lock all zippers.
How much should my loaded camera backpack weigh?
Aim for 15 to 20 pounds or less for lifelong comfort. Heavier loads can strain your back during long walks. Use a luggage scale to keep your carry-on under airline limits.
Are TSA-approved backpacks worth the extra cost?
TSA-approved packs open flat to let you keep your laptop inside. If you travel with expensive electronics, this feature can speed up security screening and reduce stress.
How do I pack lenses safely in a camera backpack?
Keep each lens in its own padded divider. Store heavy zooms closest to your back and smaller primes toward the front. This arrangement minimizes impact from bumps.
Can I bring a tripod in my carry-on camera backpack?
Yes, if your bag has external straps that secure tripod legs. Check tripod length against carry-on height limits. Wrap legs to keep them compact and stable.
What materials resist rain and moisture best?
Look for nylon or polyester with a weather-resistant coating. Bags with seam-sealed rain covers add extra protection. Test fabric against a light spray before you buy.
Conclusion
Choosing the right camera backpack to meet air travel rules takes a bit of planning, but it pays off at the gate and on location. By matching your kit list to airline requirements, picking a pack with smart organization, and adding comfort and security features, you’ll breeze through check-in.
Test a few bags in store, load them up, and see which one feels like a perfect fit. Safe travels and happy shooting!