How To Carry A Tripod Using A Camera Backpack
Picture this: you’re racing against the sunrise, camera in one hand, tripod in the other, wondering how to carry a tripod using a camera backpack without tangling straps or risking your gear. You want a solution that’s quick, stable, and keeps everything padded until you reach that perfect vantage point.
In this guide, I’ll show you exactly how to strap, secure, and carry your tripod in a camera backpack like a pro, so you spend less time fumbling and more time shooting.
Tripod Carrying Benefits
Using your backpack to haul a tripod frees up your hands and keeps your setup streamlined on the trail. Instead of juggling legs and lenses, you’ll have both hands free to navigate rough terrain or grip railings for a steady shot.
Save Space and Hands
- Hands-free operation makes hiking and gear swaps smoother
- Backpack straps tuck your tripod close, preventing it from snagging on branches
- No more dangling legs that get in the way when you’re crouched for a low angle
Protect Your Tripod Gear
Storing your tripod alongside your camera in a single pack reduces the risk of dropping or losing it. Plus, many camera backpacks offer reinforced straps designed specifically to grip tripod legs without slipping.
Speed Up Your Setup
With a tripod clipped securely, you can reach for your pack’s side strap, unhook the legs, and unfold within seconds. No more wrestling with a loose tripod hanging off your bag.
Check Your Backpack
Before you start strapping your tripod on, take a moment to inspect your pack’s attachment options. Not every camera backpack is built the same, and you’ll want features that hold your tripod snugly without compromising your camera gear inside.
Look for Tripod Straps
Most camera packs include side straps or daisy chains (webbing loops). Identify padded straps near the bottom or sides that can comfortably wrap around tripod legs. If they’re removable, test them to ensure they clamp tightly.
Tripod Strap Types
| Strap Type | Pros | Cons |
|---|---|---|
| Padded Wrap Strap | Cushions the legs, prevents scratches | Bulkier when not in use |
| Quick-Release Clips | Fast on/off, secure hold | Can rattle if loose |
| Velcro Straps | Adjustable length | May wear out over time |
Evaluate Compartments
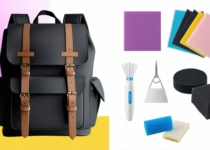
Flip open the main compartment and see how the interior dividers are arranged. You want enough room so the tripod doesn’t press into your camera or lenses. If you need guidance on custom inserts, check out essential features every photographer should want in a backpack.
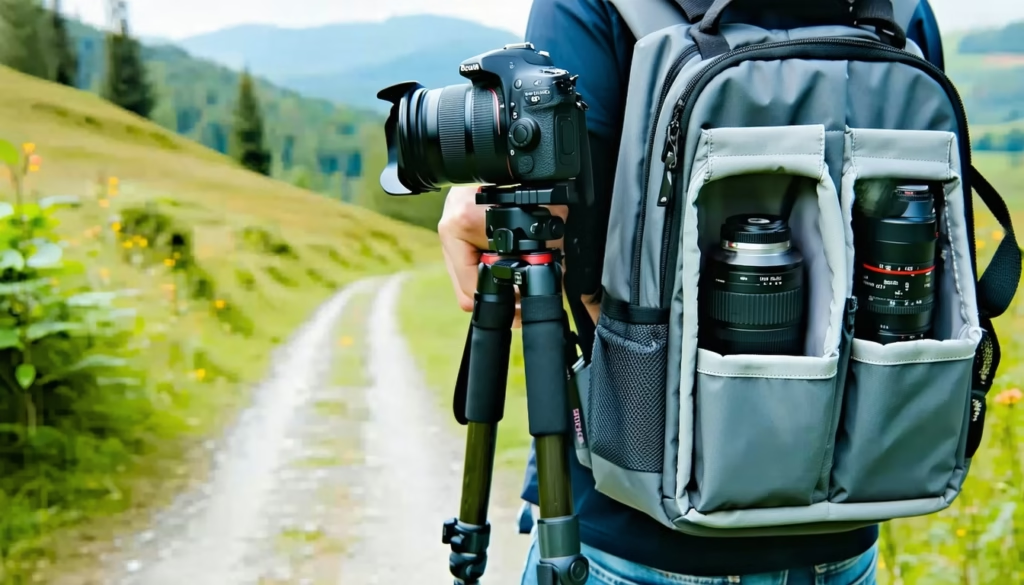
Secure Tripod Externally
Now that you’ve located your straps, let’s lock that tripod in place. Position matters—get it right and you’ll hardly notice it’s there.
Use Side Straps
- Collapse the tripod so the legs are together
- Hook the bottom leg into the lower strap loop
- Wrap the upper strap over the folded legs and snap or clip it
This creates two anchor points that prevent swinging.
Angle for Stability
To reduce bounce, point your tripod feet downward or slightly backward, aligning with your back’s curve. Not only does this keep the pack balanced, it also stops the legs from hitting you when you walk.
Protect Tripod and Camera
Gear protection isn’t just about keeping dirt out, it’s also about cushioning impacts. Let’s layer up your setup so every piece stays scratch-free.
Add Padding and Covers
Slip a neoprene wrap or lens pouch around the tripod’s center column and feet. You can also tuck a microfiber cloth between your tripod and camera body inside the pack. For more on keeping your DSLR safe, see how to protect your dslr gear in a backpack.
Shield from Weather
Sudden showers or river crossings can soak your tripod. Pack a rain cover or use a built-in rain flap to keep metal joints from rusting. If your pack lacks waterproofing, you may want to review what to look for in a waterproof camera backpack.
Balance and Organize Load
A well-packed backpack feels lighter. Distribute weight so neither your shoulders nor your tripod bear all the strain.
Even Weight Distribution
Place heavier camera bodies and tripod base near your back’s center. Lighter items like filters and batteries go at the top or front. For layout ideas, peek at the best camera backpack layouts for fast access and how to balance weight in a camera backpack.
Organize Camera Gear
Keep lenses, flashes, and cords in dedicated compartments so nothing shifts when you walk. Modular dividers let you carve out just the right spot for each piece.
Pack for Travel
Heading through airports? Your tripod setup may draw attention at security checkpoints. Let’s make screening painless.
Follow Airline Rules
Most airlines allow tripods as carry-on or checked luggage, but size limits apply. When in doubt, pack the tripod vertically in a side pocket or main compartment. Learn more about how to travel with a camera backpack on a plane.
Clear Security Checks
Loosen backpack straps so agents can inspect your gear without unstrapping the tripod. Keep your pack upright on the belt and lift it gently when they ask.
Improve Carrying Comfort
Even with perfect packing, long hikes can tire you out. A few simple tweaks keep you moving.
Adjust Your Straps
Tighten shoulder and sternum straps so the weight sits on your hips, not your shoulders. For extra guidance, check how to prevent back pain when carrying camera gear.
Take Regular Breaks
Stop every hour to loosen and rest your pack on a rock or bench. It saves your back and reminds you to hydrate.
FAQs
Can I put my tripod inside the backpack?
Yes, if your pack’s main compartment has enough width. Just don’t let it press against delicate items—use padding or a dedicated pouch for separation.
Is it better to carry a tripod inside or outside the pack?
Outside carry often saves internal space and offers faster access. Inside carry provides extra protection and a cleaner profile when you’re in crowded areas.
How do I prevent my tripod from scratching other gear?
Wrap the tripod legs with a soft cloth or neoprene sleeve. You can also secure it away from camera bodies using dividers or padding.
Will carrying a tripod affect my backpack comfort?
It can if the weight isn’t balanced. Position the tripod centrally and use hip belts to transfer load to your hips, not your shoulders.
Can I check my backpack with a tripod on a plane?
You can, but pack the tripod in a protective sleeve and inside the main compartment to prevent damage. Be aware of baggage size limits to avoid extra fees.
How do I secure a heavy tripod to my backpack?
Use both top and bottom straps, tighten them fully, and angle the legs backward. Adding a wrap or extra strap reduces sway and improves stability.
Conclusion
Carrying your tripod in a camera backpack doesn’t have to be a hassle. By choosing the right straps, protecting your gear with padding and weatherproofing, and balancing your load, you’ll glide from trailhead to viewpoint with confidence.
Next time you head out, try one tip from this guide—whether it’s angling your tripod for stability or tightening your hip belt—and see how much smoother your shoot becomes. Feel free to share your own tripod-carrying hack in the comments below!
Where To Pack Wet Tent in a Backpack || Best Practices
How to Wash a Swiss Gear Backpack – Ultimate Guide