The Best Camera Backpack Layouts For Fast Access
Imagine you’re racing golden hour light, and you’re stuck rummaging for your favorite lens. When you need the best camera backpack layouts for fast access, every second counts. In this guide, you’ll discover popular pack configurations, pro tips for tweaking dividers, and layout hacks to keep your gear at your fingertips. By the end, you’ll know exactly how to set up your backpack for any shoot, from urban streets to rugged trails.
Explore Layout Styles
Picking the right layout style is step one. Each style changes how you load and reach your gear, so let’s break down the main options. Which one suits your shooting style?
| Layout | Access Speed | Security | Weatherproof | Best Use |
|---|---|---|---|---|
| Top-Loading | Medium | High | High | Rainy or dusty environments |
| Side-Access | High | Medium | Medium | Quick lens swaps, urban photography |
| Rear-Opening | High | High | Medium | Travel, organized packing |
| Clamshell | High | Medium | Low | Weekend trips, event coverage |
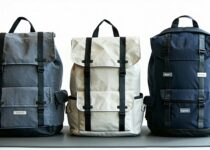
Top-Loading Backpacks
Top-loading is the classic backpack layout. You unzip the main compartment at the top and drop in your gear.
Pros
- Excellent weather resistance
- Simple design, fewer moving parts
- Comfortable shoulder balance
Cons
- Can be slow for quick lens swaps
- Gear buried deep, harder to reorganize
- Not ideal for multiple access points
Side-Access Backpacks
Side-access packs feature a panel that opens like a door.
Pros
- Fast, single-handed access to gear
- You can swap lenses on the fly
- Great for urban photography and street shoots
Cons
- Slightly less weatherproof than top-loading
- Can be bulkier at the side
- May need extra padding for protection
Check out our roundup of best camera backpacks with quick access side doors for top picks.
Rear-Opening Backpacks
Rear-opening packs unzip like a suitcase, giving full visibility.
Pros
- Full gear layout, easy to organize
- High security against theft
- Good for travel and airport checks
Cons
- Gear exposed when open
- Takes more space to lay flat
- Slightly heavier than simpler designs
Clamshell-Opening Backpacks
Clamshell packs open almost like a suitcase, but with a hinged lid.
Pros
- Superb internal organization
- Quick overview of all gear
- Easy to pack overnight essentials
Cons
- Lower weather resistance
- Not as streamlined on your back
- Can be bulky in tight spaces
Compare Access Configurations
Once you’ve narrowed your style, compare how many access points you need. Do you want one fast door or multiple entry spots?
Single vs Dual Access Points
Single access is lighter and more streamlined. Dual access gives you options: reach for lenses from one side and batteries from the other.
- Single Point
- Simpler layout
- Lighter weight
- Dual Point
- Versatile gear placement
- Faster reach when crouched or sitting
Quick-Access Side Doors
Quick-access doors are a game changer for on-the-go shoots. You can snag your camera without taking the pack off.
Key Features
- Zippered side panels
- Strap hooks to hold door open
- Padded inserts to protect lenses
Curious about specific models? See best camera backpacks with quick access side doors for tested options.
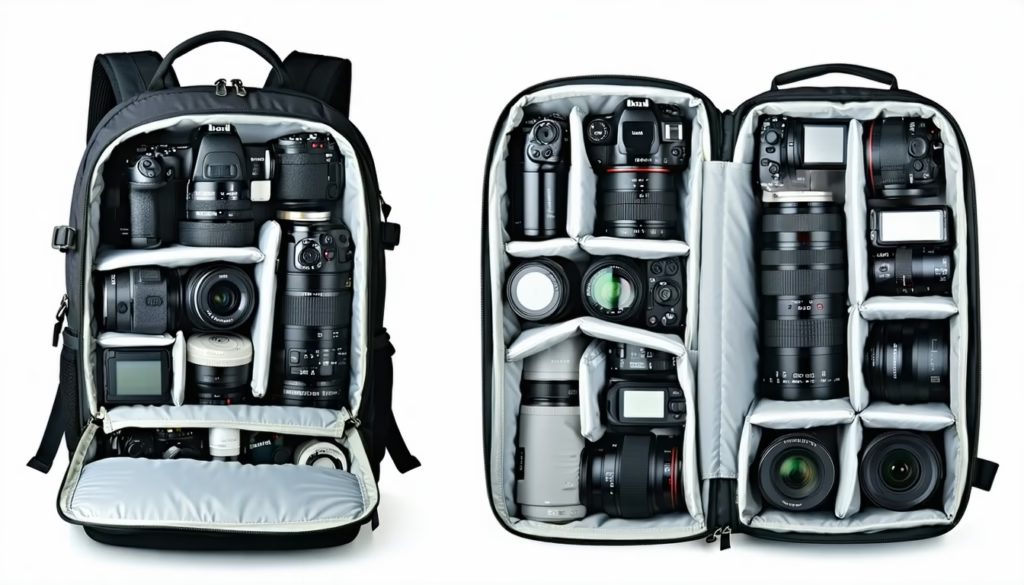
Optimize Internal Dividers
Your divider setup makes or breaks your workflow. A smart layout keeps each piece snug yet reachable.
Adjust Modular Dividers
Most camera backpacks include Velcro dividers you can move around. Here’s how to tweak them:
- Empty your pack and lay it flat
- Group your gear by size (bodies, lenses, accessories)
- Create snug compartments with dividers
- Leave small gaps for quick swaps
For more in-depth tips, check our guide on how to customize a camera backpack with inserts.
Use Modular Divider Packs
Some brands offer dedicated divider kits. These snap into place and let you experiment faster.
Benefits
- Color-coded for gear type
- Tool-free installation
- Stackable for different gear loads
See our picks for best camera backpacks with modular dividers.
Label Your Compartments
A little labeling goes a long way. Use color tape or small tags to mark pockets—so you always know where your fast barrel or memory card lives.
Balance Weight Distribution
A well-balanced pack feels lighter, reduces fatigue, and keeps you agile when you’re moving fast.
Gear Placement Tips
- Heavy items against your back midline
- Lenses and bodies in the center
- Light items (cables, filters) near the edges
- Avoid shifting gear by packing tightly
Tripod Carry Options
An off-center tripod can throw you off balance. Try these:
- Side straps for horizontal carry
- Bottom straps for vertical carry
- Integrated tripod pockets
Learn more about tripod setups in how to carry a tripod using a camera backpack.
Drone and Camera Packing
If you shoot both drone and DSLR, separate them but keep both accessible.
- Place the drone in the top or side pouch
- Lens body in main compartment
- Batteries in the front pocket for fast swap
For detailed drone tips, see tips for packing a drone and camera together safely.
Secure Your Gear
Fast access is great, but you also need to protect your investment.
Anti-Theft Features
Zipper locks, hidden pockets, and slash-proof straps can deter thieves.
- Lockable zippers
- Hidden external pockets
- Cut-resistant shoulder straps
Consider packs featured in camera backpacks with anti-theft design to buy now.
Weatherproofing Protection
Rain and dust are your gear’s worst enemies. Look for:
- Waterproof zippers
- Sealed seams
- Built-in rain covers
For more on weatherproofing, read what to look for in a waterproof camera backpack.
Memory Card Storage
Losing a memory card means losing your shots. Keep spares in a dedicated, padded case.
- Small zippered internal pocket
- Waterproof card holder
- Label slots for quick ID
See our guide on the safest way to store memory cards in a backpack.
Protect DSLR Bodies
To prevent dings and scratches, always pack bodies in padded compartments. Use lens caps and body caps when not in use.
For extra protection strategies, check how to protect your dslr gear in a backpack.
Customize for Shooting Style
Your layout should match the way you shoot. Let’s tailor setups for different genres.
Urban Photography Layouts
In the city, speed matters. A side-access layout keeps your camera ready.
- Slim profile for crowded streets
- Quick-draw side door
- Pockets for phone and wallet
See tips on how to use camera backpacks for urban photography.
Outdoor Adventure Layouts
When you’re off the beaten path, go for modular dividers and weatherproofing.
- Top-loading for rain
- Trail-ready straps for hiking poles
- Easy-access hydration pocket
Explore top picks in the best camera backpack options for wildlife photography.
Travel-Friendly Configurations
Airport security loves clamshell packs. They lay flat on the scanner.
- TSA-friendly laptop compartment
- Rear-opening main gear bay
- Compression straps to save space
Find more travel hacks at how to travel with a camera backpack on a plane.
FAQs
What Layout Type Offers the Fastest Lens Access?
Side-access layouts typically win for speed, since you can grab a lens without taking off the pack.
Can I Use One Layout for Both Drone and DSLR?
Yes, you can set up modular dividers to separate and protect both. Keep the drone in the top pouch, DSLR in the main compartment.
How Do I Reorganize Dividers for Different Gear Sets?
Empty your pack, group gear by size, then move the Velcro dividers to create snug compartments.
Is Side-Access Faster Than Top-Loading?
Generally, yes, side-access gives you one-handed reach. Top-loading is more weatherproof but slower for quick swaps.
How Should I Pack a Tripod for Quick Grab?
Use side straps or bottom loops. A vertical carry off to one side lets you unclip and unfold rapidly.
Can I Maintain Weatherproofing with Quick-Access Doors?
Look for waterproof zippers and built-in rain covers on side-access models to keep your gear dry.
Conclusion
Choosing the best camera backpack layout for fast access boils down to how you shoot. Whether you pick side-access for lightning swaps or clamshell for organized travel, tweak those dividers and balance your load. Now you know how to keep every lens, body, and accessory within reach, so you can focus on capturing your next great shot.
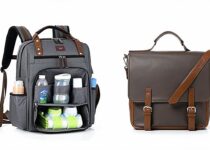
Backpack vs Messenger Bag: Which Diaper Bag Style Suits Dads Best?

Organizing Earbuds and Small Tech in Teen Backpacks