Best Ways to Add Reflective Safety Patches to Backpacks
Importance of Reflective Safety Patches
Enhancing Visibility and Safety
Who knew safety could look this good? Reflective safety patches on backpacks do way more than add flair. They’re like your secret superheroes, bouncing back light to make sure you stand out to drivers, cyclists, and anyone else in dim lighting. Whether you’re making your way through crowded streets or heading home from school as dusk falls, these patches act as your invisible protective shield.
People in lab coats have found that adding a touch of reflective material to what you wear can seriously cut down on the risk of accidents by helping you be seen more easily. So, tossing a few reflective safety patches onto your backpack isn’t just a safety win. It’s also a fresh way to showcase your style. Peep this quick look at how reflective patches can change the game:
| Feature | What It Does |
|---|---|
| Reflective Material | Sends light back like a mirror |
| Patch Size | Big patches = Big visibility |
| Placement | Snag those prime spots for max safety |
Ideal for Teen Backpacks
If you’re a teen, especially one who likes to haul around loads of stuff like laptops and textbooks, slap on some reflective patches and watch your backpack pop. It’s not just about not being run over in the dark; it’s also about giving your backpack a twist that screams ‘You!’
Lots of schools give a thumbs up to these patches, knowing they keep students safer and maybe even a bit more aware of their surroundings. Think about how you can jazz up your backpack with these patches—they come in all sorts of funky styles to match whatever you’re into.
Wanna explore more fun ways to trick out your backpack with patches? Check out our article on how to customize backpacks with patches for teenage girls. Believe it or not, you can have a backpack that’s both chic and as safe as a bright neon sign!
Ways to Add Reflective Safety Patches
Reflective safety patches don’t just make you visible; they also make your backpack look cool. So here’s the rundown on how to stick these shining beauties on your gear.
Sewing Patches onto Backpacks
Sewing ’em on is like making sure your patches are glued to your backpack with thread. Yep, they’re likely to stick around for a while. You won’t need to call grandma for this, it’s a piece of cake.
| Item Needed | Description |
|---|---|
| Needle | Sharp enough to poke through thread |
| Thread | Go wild with colors or match with the backpack |
| Scissors | Snip those threads and trim ’em clean |
- Place your patch wherever it feels right.
- Thread that needle and make a knot at the tail-end.
- Stitch around the patch making sure it won’t just fly off.
- Tie off the thread once you’re done sewing.
Ironing or Heat Pressing Patches
A steamy approach with iron-on patches is simple and quick. They come with glue on one side, so no mess here!
| Item Needed | Description |
|---|---|
| Iron | Your everyday iron, no space age tool required |
| Cloth | A thin barrier to keep things under wraps |
- Heat up the iron to match your backpack fabric.
- Lay the patch upon your pack.
- Throw a cloth over it, just for safety.
- Iron away, pressing hard for a half-minute.
- Let it chill down before hauling your stuff around.
Using Fabric Glue
If needles and irons scare you, fabric glue can be your new best buddy. It plays nice and holds things together too.
| Item Needed | Description |
|---|---|
| Fabric Glue | Works marvelously on fabrics |
| Something Heavy | To clamp the patch and let the magic happen |
- Dab a light coat of glue on the patch’s backside.
- Stick it on your chosen spot.
- Smack it down with something weighty.
- Wait for it to set following the glue’s directions.
Stick-On Reflective Patches
Straight-up sticking stuff, couldn’t be any easier. Just like stickers, but they make you shine!
| Item Needed | Description |
|---|---|
| Stick-On Patch | Pre-glued and ready to go |
| Clean Cloth | For prepping the spot, keep it tidy |
- Wipe down the area for a clean stick.
- Yank off that sticker back.
- Give it a firm push once placed.
- Let it set and then you’re all good to go.
By using these easy-peasy ideas, you can get your backpack looking snappy while keeping yourself in the spotlight during your escapades. Want more ideas to jazz up your things? Dive into our blog post on customize backpacks with patches teenage girls.
Choosing the Right Size and Style
Picking the best reflective safety patches for your backpack is all about finding the right look and keeping yourself seen. Let’s dive into what you should consider in terms of size and design.
Size Considerations for Patches
Getting the right size of reflective patches is key—you want them to do their job while looking snazzy on your backpack. The different sizes play into both how visible you are and your overall style.
| Patch Size | Usual Spot to Use | How Much They Stand Out |
|---|---|---|
| Small (2-3 inches) | Add a little zing | Fairly visible |
| Medium (4-6 inches) | Strikes a nice balance | Eye-catching |
| Large (7+ inches) | Make a big splash | Super noticeable |
Curious about the right backpack size for teenage girls? Check out our piece on what size backpack fits teenage girls over 54.
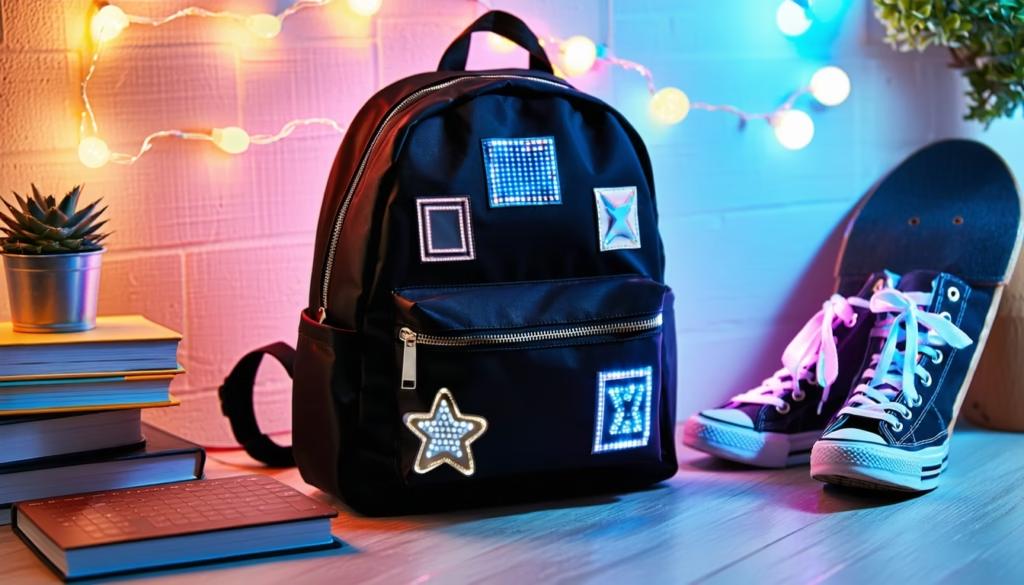
Reflective Patch Designs to Consider
The design of your patches lets you jazz up your backpack and keeps you safe. Here are some hit design themes with teenage girls:
| Design Theme | What’s the Vibe? | Style Check |
|---|---|---|
| Floral | Bright and happy colors | Girly and in vogue |
| Geometric | Neat shapes for that sleek look | Cool and modern |
| Personalized | Your own sketches or initials | One-of-a-kind flair |
| Fun Icons | Think animals, stars, or fun quotes | Lively and full of personality |
Reflective patches are a sweet way to boost your backpack’s visibility at dusk or dawn, while also giving it your unique touch. If creating your own patch designs tickles your fancy, snoop around our article on customize backpacks with patches teenage girls.
Tips for Application
Jazzing up your backpack with reflective safety patches is a fun way to add some flair while keeping things safe. To make sure those patches stick like they’re part of the original design, here are some handy tips for getting it right.
Preparing the Backpack Surface
Before slapping any patches on, let’s make sure that backpack is prepped and ready. Here’s what you gotta do:
- Clean That Spot: Grab a damp cloth and give the patch area a good wipe down. Let it dry out completely, ’cause nobody wants a soggy patch.
- Smooth the Fabric: Got bumpy or fuzzy fabric? Run a lint roller over it to catch any sneaky bits of fluff or debris.
- Picking the Best Spot: Think about where your patch will stand out and work best. Go ahead and glance over at your backpack’s reflective school bags for teenage girls for some cool ideas.
Proper Placement of Reflective Patches
Where you slap those patches matters, both for looking good and being seen. Here’s where to stick ’em:
- On the Back: Perfect for catching eyes from behind, especially when it’s dark out.
- Straps and Sides: These spots boost your visibility and add a bit of pizzazz to your pack.
- Height Considerations: Pick a spot where drivers and random peeps can see you better in low light.
| Where to Place | How Visible You Are |
|---|---|
| Back | High |
| Straps | Medium |
| Sides | Medium |
| Front | Very High |
Ensuring Secure Attachment
Once you’ve found the sweet spot for your patch, you gotta make sure it stays put. Try these methods:
- Sew It On: Old-school sewing gives you a strong hold—perfect for fabric patches. Curious about customizing backpacks with patches teenage girls? Check it out to get wild with ideas.
- Iron-On: If you go the iron-on route, keep that iron on the patch per instructions to make it stick like glue.
- Fabric Glue Frenzy: A no-sew, easy-peasy option is fabric glue—holds well on many types of materials.
Once you’re done, give it a tug to ensure it’s stuck on for good. If it seems a bit wobbly, add a few more stitches or a touch more glue to lock it down tight.
By putting these tips to use, those reflective patches will not only jazz up your backpack but also keep you safer when the lights go dim.
DIY Reflective Patch Ideas
Whipping up your own flashy safety patches can be a blast and a smart way to jazz up your backpack while keeping you safe. Here’s how you can make your own personalized reflective patches that scream “you!”
Making Your Own Reflective Patches
Crafting your own reflective patches is a piece of cake and a perfect outlet for your creative juices. Here’s the gear you’ll need to start your patch-making adventure:
| Material | What It Does |
|---|---|
| Reflective Fabric | Bounces back light, making you pop in the dark. |
| Scissors | Snip the fabric to the shape you want. |
| Iron | Comes in handy if you want to use iron-on methods for sticking. |
| Sewing Kit | Handy if you’re into the classic needle and thread approach. |
Steps to rock those patches:
- Cut out your reflective fabric into whatever shape strikes your fancy. Go wild with your designs or keep it simple.
- Use an iron to make the fabric stick if you’re using the iron-on type. Nail the steps your fabric recommends for best sticking power.
- For super strength, stitch the patches onto your backpack. This way, they aren’t going anywhere.
Looking for more ways to spice up your backpack? Check out our guide on customizing backpacks with patches for teenage girls.
Personalizing with Reflective Materials
Want your backpack to be a reflection of your personality? Here’s how you can jazz up your patches with different reflective materials:
- Fabric Paints: Slap on some reflective paint to draw patterns or write something snazzy. Just let it dry before you stick it on.
- Stickers: Reflective stickers are your new best friend. Stick them on your fabric before you slice it up.
- Gemstones and Sequins: Bling your patches with shiny gemstones or sequins. They add shimmer and shine while doing the visibility job.
- Layering: Mix and match reflective stuff, like a little mesh here and solid fabric there, for layered patches that are eye-catching and useful.
Combining these materials can make your patches the talk of the town. You won’t just light up the night; you’ll have a backpack that totally gets you. Need more on safety while looking cool? Dive into our tips on backpack safety tips for teenage girls.
Putting together DIY reflective patches isn’t just about being safe—it’s a way to let your personality shine. Get your craft on!
Staying Stylish and Safe
Adding Reflective Patches to Fashion
Who knew staying safe could look so cool? With reflective safety patches, you can jazz up your backpack and stay visible. There’s a whole bunch of shapes and colors to choose from, so you can really show off your style. Maybe go for a mix to keep things fresh and uniquely you.
| Patch Shape | Fashion Fun |
|---|---|
| Stars | Brings a playful twist |
| Geometric | Adds a sleek, modern edge |
| Floral | Sprinkles in a bit of elegance |
| Custom Designs | Makes your bag stand out and scream ‘you!’ |
Get creative with where you stick ’em! Try along the straps or come up with a cool pattern on the bag’s body. You’ll be strutting around with a bag that’s both a fashionable accessory and a safety buddy for those late-night adventures.
Personalizing Backpacks for Safety
Sprucing up your backpack with reflective patches isn’t just about looking good—it’s making sure you’re safe too. Pick patches that vibe with your backpack’s look. Here’s how you can amp things up:
- Accent Colors: Pair the color of the patches with your bag, so they blend in perfectly. No patch should scream, “Add-on!”
- Layering: Stack ’em up and create a 3D effect. This not only turns heads but also keeps you on the radar.
- Smart Patch Placement: Stick patches where they light up the most—like the sides or back of the bag. You’ll be noticed and safe at night.
By trickin’ out your backpack with these patches, you’re covering both style and safety bases. Think about the look and how you can use patches to turn your backpack into a funky yet practical everyday companion. Got the itch to customize more? Check out our piece on personalized backpacks with patches for teens.

Layering With Packing Cubes In A Weekender Backpack

Guide To Perfect Eco-Friendly Yoga Backpack: Materials & Brands