Creating an Emergency Safety Kit Inside a Backpack For Teen Girls
When you’re creating an emergency safety kit inside a backpack for teen girls, it helps to picture real scenarios—say you’re on a field trip, walking home after dark, or facing a sudden migraine in class. You want gear that’s compact, reliable, and tailored to your needs. By the end of this guide, you’ll know exactly what to include, how to organize it, and when to refresh your supplies so you stay ready for just about anything.
You’ll save time and stress by building a kit that fits your style, your backpack, and your daily routine. Let’s dive in and make sure you always have the essentials close at hand.
Why Create a Safety Kit
Ever felt uneasy walking home alone or caught in a sudden rainstorm without a raincoat? A well-stocked kit turns “uh-oh” moments into “I’ve got this” wins. You’ll build confidence knowing you can handle minor scrapes, stay hydrated, or reach help fast.
Key benefits at a glance:
- Boosts peace of mind for you and your parents
- Covers first-aid, personal security, and comfort needs
- Fits right inside your everyday backpack
Plus, a custom kit means you’re not hauling bulky items you’ll never use. Want to swap in period products or allergy meds? Go for it. Your kit, your rules.
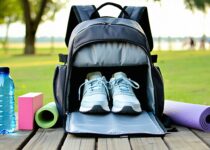
Choosing Your Backpack
Your backpack isn’t just a carrier—it’s the foundation of your kit. Look for:
- Multiple compartments to separate items (no more scrambling)
- Hidden anti-theft pockets for passports or cash
- Lightweight but sturdy material
- Padded, adjustable straps for comfort
- Space for a hydration straw or water bladder
Many teen backpacks have modular designs so you can clip on small pouches or charm lanyards without ruining fabric. Think about how you carry books, tech, and sports gear—your safety kit should slot right in without adding bulk.
Ready to pick your perfect pack?
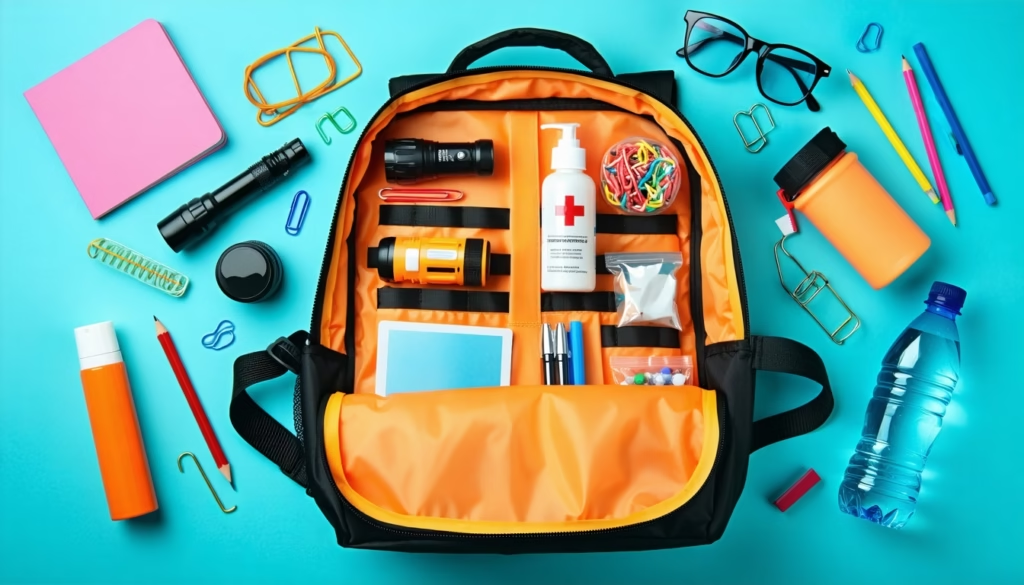
Stocking First Aid Essentials
Scrapes, headaches, or sneezes happen. Here’s how to cover the basics:
Bandages and Wound Care
- Assorted adhesive bandages (various sizes)
- Gauze pads and medical tape
- Antiseptic wipes or alcohol pads
- Antibiotic ointment packets
Medications and Treatments
- Over-the-counter pain reliever (ibuprofen or acetaminophen)
- Antihistamine tablets for allergies
- Small heat pack for cramps or muscle aches
- Allergy epinephrine injector if prescribed
Tools and Extras
- Tweezers for splinters
- Pair of disposable gloves
- Mini scissors for cutting tape or gauze
- Instant cold pack
Keep these items in a clear zip pouch so you can spot them instantly. You might even label the pouch “First Aid” using a permanent marker or a color-coded sticker.
Adding Personal Safety Tools
It’s smart to carry gear that boosts your security and gets attention if you’re in trouble. Here’s a quick comparison of top tools:
| Device | Loudness | Battery Life | Estimated Cost |
|---|---|---|---|
| Personal Alarm | 120 dB | 1 year standby | $15 |
| Safety Whistle | 100 dB | Unlimited | $5 |
| LED Mini Flashlight | N/A | 50 hours constant | $12 |
| Pepper Spray (where legal) | N/A | 2-year shelf life | $20 |
- Personal alarm: clip to your backpack strap for easy access
- Whistle: loop through a keychain or lanyard
- Flashlight: choose a model with a wide beam for maximum visibility
A small zip pouch on your backpack’s exterior can hold these items for a lightning-fast reach.
Including Hygiene, Hydration, and Comfort Items
Staying fresh and comfy helps you stay calm in unexpected situations. Think beyond basic first aid.
Hygiene Essentials
- Hand sanitizer packets or mini bottle
- Travel-size tissue packs
- Lip balm with SPF
- Skincare items carried safely (moisturizer, acne wipes)
Hydration and Snacks
- Collapsible water bottle or clip-on water pouch
- Electrolyte powder packets
- Granola bars or trail mix in resealable bags
- Reusable straw if your backpack has a hydration system
Comfort and Warmth
- Compact emergency blanket
- Thin pair of gloves or knit beanie
- Foldable rain poncho
A slim sling pouch works great for hygiene bits while a small insulated pouch keeps snacks and cold packs from warming up other items.
Packing Tech and Communication Gear
When your phone dies or you need to share your location, these gadgets matter.
Chargers and Power Banks
- Slim power bank (5,000 mAh minimum)
- Short, sturdy charging cable
- Wall plug adapter if you switch countries
Emergency Contacts and Apps
- Printed and laminated card with family numbers and medical info
- Preloaded safety apps (GPS sharing, local emergency services)
- Offline map downloads for your area
Comparison of popular safety apps:
| App | Platform | Key Feature |
|---|---|---|
| Life360 | iOS, Android | Real-time location sharing |
| bSafe | iOS, Android | SOS button with audio recording |
| Offline Maps | iOS, Android | Turn-by-turn navigation without data |
Keep tech gear in a padded pouch or section to avoid damage. For more ideas on stashing small electronics, check out our tips on organizing earbuds and small tech in teen backpacks.
Organizing Your Safety Kit
You want lightning-fast access, not a treasure hunt. Here’s how to stay sorted:
- Use clear, color-coded pouches for each category
- Label pouches with waterproof tags or permanent marker
- Pack heavier items closest to your back for better weight distribution
- Keep frequently used items (sanitizer, lip balm, whistle) in outer pockets
Numbered or alphabetical labels let you memorize where everything lives. For field trips or long days, you can grab precisely what you need without opening every compartment.
Updating Your Kit Regularly
An expired pain reliever or a drained power bank isn’t much help. Set a routine:
- Check expiry dates every three months
- Replace single-use items after each use
- Recharge power banks and test LEDs monthly
- Swap out seasonal gear (add gloves or remove blanket as needed)
Quick-check checklist:
- Review medication expiration
- Test alarm and flashlight
- Refill snacks and hydration
- Refresh hygiene packets
Mark your calendar or set a phone reminder so you never forget. It takes five minutes and keeps your kit battle-ready.
Frequently Asked Questions
1. Where’s the best spot in my backpack for the kit?
Aim for a middle compartment that’s easy to reach but still protected. Front pockets work for quick-grab items like hand sanitizer or a whistle.
2. Can I include prescription meds in my kit?
Yes, if your doctor approves. Keep them in original packaging or a clearly labeled bag to avoid mix-ups.
3. Is pepper spray legal for teens?
Laws vary by state and country. Check local regulations before adding any self-defense spray to your kit.
4. How much should my kit weigh?
Aim to keep it under 2 pounds so it won’t strain your back. Swap bulky items for lighter alternatives, like a thin foil blanket instead of a thick one.
5. What’s the smartest way to carry period products?
Use a small resealable bag or pouch inside your hygiene section. Consider discrete wrapping or their original packaging to avoid leaks.
6. Should I include earplugs or eye mask?
If you’re prone to migraines or light sleepovers, a pair of compact earplugs and a foldable eye mask can come in handy.
7. How do I keep the kit organized when I need quickly swap items?
Keep an editable packing list on your phone or in the backpack. After you remove something, tick it off and replace it ASAP.
Conclusion
Building an emergency safety kit inside your backpack gives you peace of mind every time you head out. With first-aid basics, personal safety gadgets, comfort items, and tech essentials neatly organized, you’ll feel ready for unexpected detours.
Take five minutes this weekend to assemble your kit, label your pouches, and set a reminder to refresh supplies. Got a favorite safety hack or must-have item we missed? Share it in the comments so everyone can stay safe and prepared.
Benefits Of Using A Camera Backpack Over A Shoulder Bag
Why Expandable School Bags and Backpacks Are Useful for Teens