How To Use A Camera Backpack For Night Photography Trips

If you’re wondering how to use a camera backpack for night photography trips, you’re in the right place. Heading out after dark to shoot star trails, cityscapes, or moonlit forests can feel tricky when your gear’s all jumbled. In this guide, you’ll learn how to pack, protect, and access your camera backpack so you stay nimble under low light.
Here’s the promise: by the end, you’ll know exactly how to set up your bag for fast access, safe gear, and zero surprises once the sun goes down.
Prep your backpack
Before you toss in your gear, take a minute to get your pack ready for night shoots. A little prep saves a lot of time when the stars start to show.
Choose the right pack
Your ideal pack depends on your kit size and shooting style. Look for features like padded dividers, weatherproof fabric, and easy‐grab zipper pulls. If you need inspo on unique storage ideas, check out creative ways to store filters in a camera backpack.
Adjust straps and padding
A snug fit keeps your bag from bouncing as you hike. Tighten sternum and waist straps so most weight sits on your hips. Loosen or tighten shoulder straps until the bag rides just below your shoulder blades. That way you won’t feel every pebble underfoot.
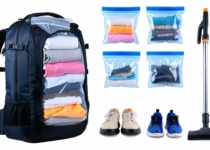
Organize gear efficiently
Night shoots often involve swapping lenses or grabbing a remote trigger in the dark. Organize your gear so you can find it blindfolded (almost).
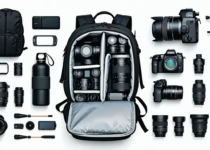
Pack cameras and lenses
Place your primary camera body in the main compartment, lens attached. Stow extra lenses upright or flat—whichever fits snug—so they don’t roll around. For best practices on lens placement, see best practices for storing lenses upright or flat.
Use the right order
- Body with lens attached goes in first.
- Lighter primes or wide-angle glass next.
- Heavier zooms last, closest to your back for balance.
Need a deeper dive on the packing order? Here’s the best packing order for cameras and accessories.
Stash accessories smartly
Use side pockets or top pouches for items you grab often. Think: lens cloth, remote shutter, ear warmer (it gets chilly). Cord organizers help keep cables tangle-free—see organizing cables and chargers in a camera backpack for tips.
Protect against moisture
Nighttime temperature shifts can cause condensation inside your bag. Don’t let foggy lenses ruin your shot.
Prevent condensation buildup
Seal your cold gear in plastic bags before it warms up in the pack. Open the bags once you’re back in a warm environment to let moisture escape. For more humidity hacks, check how to prevent condensation inside camera backpacks.
Pack desiccants and covers
Slip a few silica gel packs into your compartments. They soak up stray humidity without adding weight. Rain covers or waterproof liners add a second layer of defense, especially if dew forms on foliage.
Access gear quickly
When the Milky Way peaks overhead, you don’t want to fumble for your remote or wide-angle lens. Design your pack layout for instant access.
Use front-loading pockets
Packs that open like a suitcase let you see every item at once. That front-load design beats top-loading for speed. For pros and cons, check pros and cons of front-loading camera backpacks.
Label compartments
Tie small colored ribbons or use adhesive dots inside pockets. Color-coding helps you know exactly where you stashed your flashlight, battery, or lens warmer in a split second.
Manage weight distribution
A well-balanced pack stops fatigue and back pain on those long night hikes.
Balance gear and personal items
Put heavier camera gear closer to your back, and lighter items (snacks, headlamp) toward the front. If you’re bringing water or personal supplies, see how to distribute weight between camera gear and personal items.
Avoid shoulder strain
Switch to a padded hip belt for loads over 10 pounds. Adjust it so it holds 60–70 percent of the weight. If your pack straps keep slipping, these tips on how to prevent camera backpack straps from slipping can help.
Handle power and lighting
Nothing kills a shoot faster than dead batteries or no light to adjust your settings.
Store batteries and chargers
Keep fresh and used batteries separate in marked pouches. A small power bank in your bag can charge your phone or LED panel in a pinch. For more on battery safety, see how to safely carry camera batteries inside a backpack.
Pack portable lights
A headlamp with a red-light mode helps preserve your night vision. Clip a small LED keychain to your zipper pulls so you can find them blind. Want more ideas? Check camera backpacks with integrated solar charging panels for off-grid power options.
Adapt in the dark
Even the best gear can feel foreign in low light. Small tweaks make a big difference.
Find zipper pulls easily
Swap factory pulls for glow-in-the-dark tags or paracord loops. That way you won’t waste time digging for zippers when your hands are cold.
Use reflective tabs
Add tiny reflective patches near your bag’s handles or buckles. When you shine your headlamp, you’ll see exactly where to grab your pack for a quick move or shot adjustment.
Care and maintenance
After your shoot, your pack and its contents need some TLC before the next adventure.
Clean and inspect gear
Empty your pack and brush away dust or grit. Wipe down dividers and fabric panels with a damp cloth. Inspect padding for tears and seams for loose threads.
Store your pack
Hang your bag in a cool, dry spot. Leave it partially unzipped to air out any residual moisture. That way it’s fresh the next time you head out under the stars.
Frequently asked questions
How do I choose a backpack size for night photography?
Pick a pack that holds your full kit plus extras (batteries, snacks, layers). Aim for 20–30 liters so it’s roomy without becoming a burden on long hikes.
What’s the best way to avoid moisture inside my bag?
Seal cold items in plastic bags, use silica gel packets, and include a rain cover. Let your pack air-dry fully after each trip so you start with a dry interior.
Can I use a hiking backpack instead of a camera-specific one?
Yes, you can adapt a hiking pack by adding padded dividers and camera sleeves. For a full guide, see how to adapt a hiking backpack into a camera backpack.
How should I pack a tripod for night shoots?
Store your tripod on side straps or in a dedicated pocket. Tighten the straps so it won’t swing. For more tripod tips, check tips for carrying multiple tripods with a backpack.
What’s the easiest way to swap lenses in the dark?
Organize lenses in labeled, front-loading pouches. Use glow tags on zippers and keep a headlamp in your top pocket for a quick switch.
How do I avoid back pain on multi-hour shoots?
Balance the load with heavier items close to your body, use a supportive hip belt, and take short breaks to stretch. For ergonomic tips, see how to avoid shoulder pain from heavy camera backpacks.
Should I pack snacks and water in my camera bag?
Yes, but keep them in separate, sealed pouches to avoid spills. For safe snack packing, read how to pack snacks and water in a camera backpack safely.
Conclusion
Night photography trips can be magical when you’re prepared, and your backpack setup is a big part of that. Follow these steps to pack smart, access gear quickly, and protect your equipment from moisture and strain.
Give your pack a test run on an evening walk before your big shoot. Tweak as you go, and you’ll be capturing crisp, clear night images without fumbling for gear in the dark. Enjoy the view, and happy shooting!