Using A Camera Backpack For Street Photography
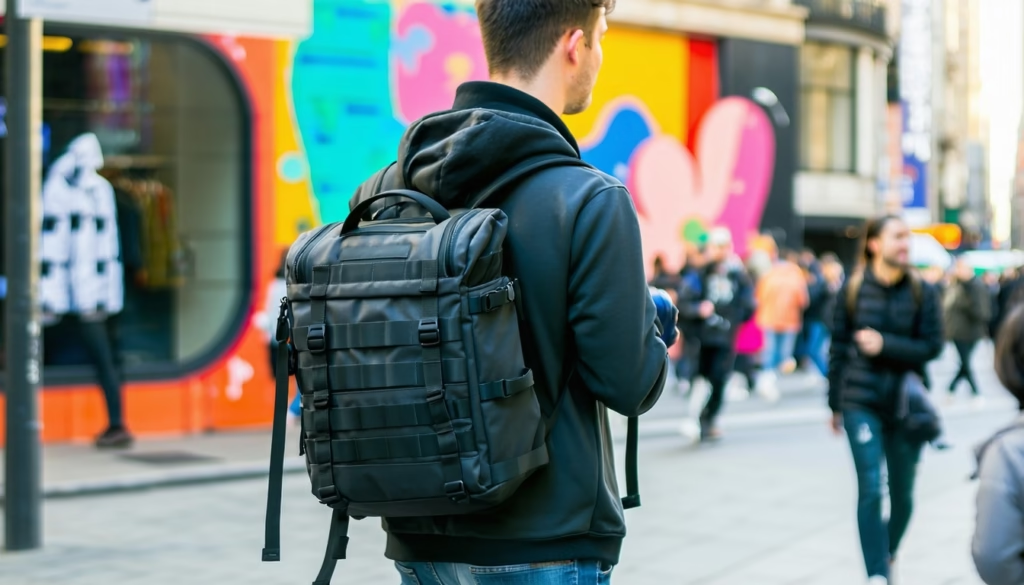
Street photography is all about capturing fleeting moments on the move. If you’re using a camera backpack for street photography, you know that speed, comfort, and organization can make or break your day. In this guide, you’ll learn how to pick the right pack, pack it smartly, carry it comfortably, and shoot efficiently in busy urban environments.
Assess Your Needs
Define Your Shooting Style
Before you dive into gear, think about how you like to shoot. Do you weave through crowds looking for candid expressions? Or are you drawn to architectural lines and symmetry? Your approach affects what gear you need at arm’s reach. For tips on adapting your backpack setup to city streets, check out how to use camera backpacks for urban photography.
Determine Gear Essentials
Make a list of the lenses, bodies, and accessories you rely on most. Here’s a quick starter list:
- Compact mirrorless or DSLR body
- 24–70 mm or 35 mm prime lens
- Spare battery and memory cards
- Lens cleaning kit
- Lightweight rain cover (just in case)
Keep this list handy when you shop for a pack or customize your dividers.
Choose The Right Pack
Size And Fit
A pack that’s too big feels awkward when you dart through narrow alleys, while one that’s too small won’t hold your essentials. Measure your torso length and shoulder width, then compare with manufacturer sizing charts. If you need more guidance, here’s how to choose the right size camera backpack.
Access And Organization
When your subject appears, every second counts. Look for side or top access points that let you grab your camera without unpacking everything. The best camera backpack layouts for fast access often include:
- Dedicated side doors for quick body swaps
- Top hatches with adjustable dividers
- External pockets for small tools
Durability And Weatherproofing
Urban shoots don’t stop for spills or light rain. A tough exterior and sealed zippers protect against splashes and dust. If you’re serious about staying dry, see what to look for in a waterproof camera backpack. Bonus tip, pack a microfleece pouch—wet lenses fog faster in cool city air.
Pack For Street Shoots
Essential Gear List
Here’s a typical street photography kit you can stash in your backpack:
- Primary camera with a modest zoom or prime lens
- Backup camera body (optional)
- Flash or portable LED panel
- ND or UV filter
- Lens cloth and blower
- Smartphone for notes or quick snaps
Feel free to tailor this list to your style, but keep it light.
Organize For Speed
A well-structured interior means you won’t fumble for your gear. Try these organization tricks:
- Group gear by usage frequency—daily essentials in front
- Label compartments with colored tape or tags
- Use removable dividers to adjust spacing on the fly
Lens And Body Placement
Store your most-used lens and body in the easiest-to-reach compartment. Position secondary items behind or below so you avoid digging through the entire pack.
Secure Valuables
Crowded streets can be a magnet for opportunists. Stow memory cards and spare keys in hidden or zippered pockets. For more ideas, check out the safest way to store memory cards in a backpack.
Carry Gear Comfortably
Adjust Straps Properly
Take a minute to tweak your shoulder and sternum straps before you head out. A snug fit keeps the pack stable when you’re weaving through traffic. Squeeze your shoulder straps, fasten the waist belt if available, and you’re good to go.
Balance Your Load
Uneven weight leads to fatigue and awkward posture. Place heavier items close to your back and centered. Lighter gear can go higher or further from your spine. This simple shift makes a big difference after hours of shooting.
Prevent Strain
Ever had a sore lower back after a day of roaming? Your backpack should sit snugly above your hips so the weight transfers to your core. If you want more relief, read how to prevent back pain when carrying camera gear.
Shoot Efficiently On The Go
Quick Gear Retrieval
Practice opening your pack smoothly at home. Those first few fumbles on the street can cost you the shot. Zip or unlatch in a single fluid motion, then pull your camera out in one continuous move.
Stay Agile In Crowds
In busy areas, keep one strap over your shoulder instead of both. You’ll be ready to swing the pack around for a rapid grab. Just remember to strap it back on properly when you wrap up—that’s a simple safety measure.
Protect Gear In Transit
When you’re on the move, minimize rattling. Use lens caps, keep glass elements tucked in padded dividers, and stow small items in mesh pockets. If you’re switching lenses frequently, consider lens pouches for extra cushion.
Maintain Your Backpack
Clean And Inspect
After each street session, brush off dust and crumbs from sidewalks and cafés. Wipe the interior and exterior with a damp cloth, then let everything air dry. Check seams and zippers for wear so you catch problems early.
Update Inserts And Dividers
Your needs evolve with every shoot. Swap out dividers based on your current load—sometimes a minimalist setup is all you need. Investing in modular inserts means you can reconfigure on the fly without buying a new pack.
Frequently Asked Questions
What size backpack is ideal for street photography?
Street photographers often prefer midsize packs (20–25 L). They’re roomy enough for essential kit, yet compact for quick access and tight spaces.
Can I use a tripod with a street photography pack?
Absolutely, but choose a pack with tripod straps or loops. For detailed instructions, see how to carry a tripod using a camera backpack.
Is it safe to leave my backpack unattended?
In crowded areas, it’s best to keep your pack on your back or use anti-theft straps. For more safety pointers, check out camera backpack safety tips for crowded places.
How do I prevent lens scratches in a busy city?
Store lenses in padded sections, keep caps on, and avoid overpacking. For extra scratch protection, learn tips for keeping lenses scratch-free inside a backpack.
Should I carry a rain cover even on cloudy days?
Yes, city weather can change fast. A lightweight rain cover fits in a pocket and keeps gear dry during sudden drizzles.
How can I stay comfortable during long shoots?
Adjust your straps, balance your load, and take short breaks to loosen up. Reviewing posture tips can help you avoid pain later.
What’s the benefit of a backpack over a shoulder bag?
Backpacks distribute weight evenly, leaving your hands free and reducing neck strain. For a deeper dive, see benefits of using a camera backpack over a shoulder bag.
Conclusion
Using a camera backpack for street photography gives you the freedom to roam, shoot, and adapt without missing a beat. By choosing the right pack, organizing your kit, and fine-tuning fit and load, you’ll stay ready for every candid moment.
Start with these steps today—adjust your straps, sort your dividers, and hit the streets with confidence. Your next great shot awaits.
Yoga Backpacks for Cycling & Public Transit: Function Meets Style
Backpack vs Messenger Bag: Which Diaper Bag Style Suits Dads Best?