How To Pack Makeup Essentials Safely in Teen Backpacks
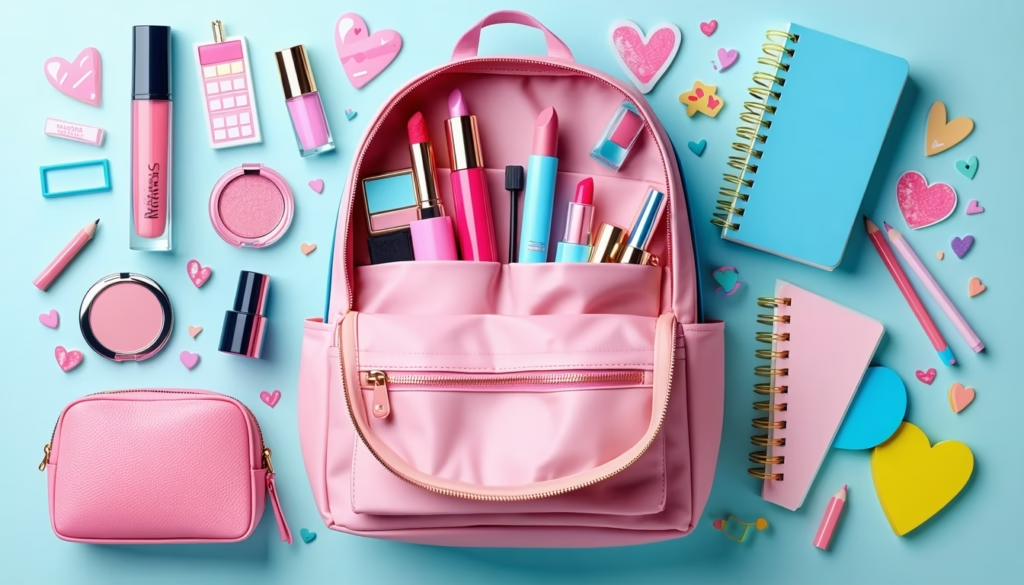
If you’ve ever wondered how to pack makeup essentials safely in teen backpacks, you’re in the right place. Carrying your go-to lip gloss, eyeshadow palette, or foundation alongside textbooks and a water bottle can feel like a balancing act. You want quick touch-ups without leaks, cracks, or stains on your school supplies.
In this comprehensive guide, I’ll walk you through selecting the perfect pouches, organizing by category, securing fragile pieces, and packing like a pro. You’ll learn tips for everyday school days, after-school touch-ups, and weekend hangouts, all without the mess.
Choose the Right Makeup Bag
Picking a pouch that fits in your teen backpack and shields your cosmetics is step one. You’ll find options ranging from clear plastic cases to travel kits designed for professional makeup artists. The right bag should keep your products snug, dry, and easy to reach, no matter how your day unfolds.
Consider these features before you shop:
- Water Resistance: Rainy commutes or accidental spills happen. A pouch lined with silicone, vinyl, or TPU stops moisture from seeping through fabric.
- Durable Zippers: A smooth, thick-toothed zipper glides even when the pouch is packed full. Look for nylon or metal designs that won’t snag.
- Lightweight Construction: Nylon and canvas organizers won’t add bulk when textbooks and gear pile up. Cordura fabric offers a balance of strength and weight.
- Interior Dividers: Some kits include removable dividers that let you customize compartments by size and shape. This prevents small items from tumbling when you open the bag.
- Integrated Mirror: A built-in mirror on the pouch lid turns any desk into a vanity station for quick touch-ups.
If you’re on a tight budget, creative DIY options work well too. A hard-shell sunglasses case or a repurposed pencil box can protect compact powders and palettes. For an ultra-low-cost hack, line a small makeup bag with bubble wrap or cotton pads you already have at home.
Here’s a quick comparison of popular pouch types:
| Pouch Type | Pros | Cons |
|---|---|---|
| Silicone Pouch | Wipe-clean, waterproof, flexible | Bulkier, not foldable |
| Clear Plastic Case | Easy to find items, transparent | Can crack, scratches visible |
| Fabric Organizer | Soft cushioning, lightweight | Not waterproof, stains easily |
Once you’ve selected a bag, measure it against your backpack’s pockets to ensure a perfect fit. A makeup pouch that slides in and out smoothly will become your new MVP of school days.
A final pro tip: color-coordinate your pouch with your backpack or accessories to spot it instantly in a sea of school bags. After all, life as a teen moves fast, and the last thing you want is to waste time hunting for your cosmetics case when the bell rings.
Organize Your Makeup By Category
Sorting your cosmetics prevents spills, saves time, and keeps your backpack tidy. Think of your makeup like school subjects: each group needs its own notebook. By separating tools, liquids, and powders, you’ll never dig through a jumble again.
Divide Tools and Brushes
Keep brushes, applicators, and tools in a dedicated roll or case. If you toss them loose, bristles bend and handles scratch. A canvas brush roll or a slim brush sleeve organizes by size, making it easy to grab your foundation brush without pulling out every single tool.
Brush guards (tiny plastic tubes that slip over brush heads) add protection against bent bristles. Simply slide each tool into its guard before rolling or zipping up your kit. This maintains brush shape for smooth blending day after day.
Imagine you’re rushing to lunch and need a quick highlight touch-up. With a brush roll, you unzip once and find your highlighter brush instantly, no digging required.
Sort Liquids and Creams
Liquid formulas like foundation, primer, and mascara are lifesavers but can wreak havoc if they leak. Transfer products into travel-size bottles with silicone seals. Clear bottles help you see how much you have left.
Store all liquids and creams together in one section of your makeup bag. That way, if a lid loosens, you catch everything in a single spill zone instead of drips scattered across several pouches. Grouping also helps you apply your routine without switching pouches mid-step.
Pro Tip: Label travel bottles with a black Sharpie or printable stickers, so you don’t mistake your primer for sunscreen on a busy morning.
Use Small Cases for Powders
Pressed powders, blush compacts, and eyeshadow palettes can crack under pressure. Drop a thin piece of cotton or a makeup sponge over the pan before closing the lid. This buffer soaks up shock from accidental bumps.
If you have multiple powders, stack them vertically in a slim pouch. Vertical storage looks neater and gives each compact breathing room. You’ll save space and reduce the risk of shattered pans.
Label Your Pouches
Use removable labels, washi tape, or small tags to mark pouches by category. A “Face” sticker for your foundation kit and an “Eyes” tab for shadows makes finding what you need quick and stress-free. Cute stickers add a touch of personality and double as color coding if you like a dash of fun in your setup.
Don’t forget small extras like a sharpener, tweezers, and cotton swabs. Pack them in a mini zip bag or repurposed pill case so they stay contained and don’t roll around.
For more creative ways to sort and color-code your supplies, see using color-coding inside a teen backpack for better organization.
Secure Fragile Items
A shattered eyeshadow or cracked mirror is no fun. Protect breakable pieces with a few simple tricks.
Cushion With Soft Fillings
- Line the bottom of your makeup pouch with cotton balls, foam stickers, or scrunched tissue paper.
- Place extra padding between items with makeup sponges or bubble wrap scraps.
- Fill any gaps to keep palettes and compacts from shifting during the commute.
Use Brush Guards
Brush guards prevent bristles from bending or fraying. After cleaning, slide each brush into its guard before packing, then remove when you’re ready to apply. They help maintain brush shape for smooth blending every time.
Store Palettes Vertically
Stand eyeshadow, contour, and glow palettes on their sides, like books on a shelf. This orientation reduces horizontal pressure if your backpack takes a tumble, and it makes it easy to see your color options at a glance.
Protect Mirrors and Glass
If your compact has a mirrored lid, add a small square of bubble wrap or foam between the mirror and powder. Alternatively, use a piece of tissue or a sticky note tab as a thin buffer. This extra step stops glass shards from scattering in your bag.
Trust me, I learned this the hard way when my favorite blush exploded inside my backpack and left pink speckles in my notebook sleeve.
For super-protection, try a hard-shell travel case originally made for electronics or spectacles. These sturdy boxes often include foam inserts that cradle your palettes and leave them unscathed, even if your backpack tips over.
Prevent Leaks and Spills
Worried about lip gloss puddles ruining your textbooks? These sealing secrets have you covered.
Seal Liquid Containers
- Screw bottle caps on tightly each time you repack.
- Wrap a small piece of clear tape around the lid for an extra barrier.
- Check lids for hairline cracks or loose seals before leaving home.
Double-Bag Containers
Slip mascara tubes, liquid liners, and cream pots into small, see-through zip-top bags. If a container leaks, the outer bag catches any drips and keeps them away from your books.
Carry Travel-Size Bottles
Transfer foundation and toner into 3 to 4 ounce TSA-friendly bottles. They weigh less, reduce spill risk, and cost less to replace if they break. Top them off at home to save money.
Use Plastic Wrap Barrier
Place a square of plastic wrap over the opening of your bottles, then screw the cap back on. This DIY seal catches pressure build-up and prevents liquid from escaping, even under pressure.
Avoid Overstuffing Your Bag
Crowding your pouches can press bottles open. Leave a little breathing room around your makeup case and keep it separate from tightly packed books or water bottles. This prevents pressure leaks and keeps products intact.
I once crammed a chunky highlighter between my textbooks, and by lunchtime it had oozed out, turning my bag into a luminous glow trap. Never overstuff.
Check out how to safely carry skincare items in backpack for teen girls for more on transporting lotions and serums.
Use Backpack Compartments Wisely
Your backpack likely has more pockets than you realize. Using them strategically can keep makeup safe and organized.
Identify Hidden Pockets
Many teen backpacks include anti-theft compartments or hidden zippered pockets against the back panel. These spots are perfect for valuables like your makeup pouch because they’re less likely to open accidentally. For backpacks with built-in security features, see backpacks with hidden anti-theft pockets for teen girls.
Leverage Mesh and Elastic Pockets
Side mesh pockets meant for water bottles can hold brushes in protective sleeves. Interior elastic loops or pen holders work great for lip liners, tweezers, and brow brushes. Repurposing these features keeps items neat and visible.
Use Zippered Internal Sleeves
Most backpacks have small internal zipper sleeves perfect for storing liquids away from papers. Slide your travel kits or double-bagged items into these sleeves to protect textbooks from leaks.
Avoid Damp or Insulated Compartments
Some backpacks include insulated lunch pockets or wet pockets for gym clothes. Avoid these for makeup, as moisture or temperature swings can ruin products. Stick to dry compartments designed for electronics or small valuables.
Pack Strategically in the Backpack
How you layer your makeup pouches inside your bag affects comfort, balance, and product safety. Follow these layout tips.
Layer for Weight Distribution
Heaviest items—palettes and lined bottles—belong closest to your spine and at the bottom. Lighter pouches go near the top or front for easy access. Even weight distribution prevents sagging and keeps your bag upright so makeup won’t slide around.
Place Makeup Close to You
Keep daily-use items in the compartment you open most often. A front or side pocket makes grabbing concealer or lipstick quick and simple, reducing the risk of knocking over jars while digging.
Avoid Pressure on Containers
Sandwich your makeup bags between soft items like a hoodie or scarf rather than textbooks. Hard covers pressing down on pouches can crack powders and bend tubes. Treat your makeup pouch like a delicate lunch box.
Protect Against Temperature Changes
Heat can soften cream products and cold can thicken them. Store lipstick and creams away from direct sun exposure by tucking pouches toward the center of your backpack. On chilly days, carry your pouch inside your jacket until you reach class, then repack.
Secure with Compression Straps
If your backpack has internal or side compression straps, wrap them around your makeup pouch. This extra stability prevents your kit from sliding into other gear when you move.
I learned the hard way when I stashed my pouch at the bottom only to find it buried and crushed under my history textbook.
Create a Quick-Access Makeup Zone
Need a last-minute lip color tweak before a Zoom call or bus ride? A mini makeup zone turns your backpack into a mobile vanity.
Use Front or Side Pockets
Dedicate a front pocket to your top three daily essentials: lip balm, concealer stick, and a mirror. You’ll avoid opening your entire bag for a quick swipe.
Attach Mini Pouches with Clips
Use small carabiners or keychain hooks to hang tiny zip pouches from interior zipper loops. These pouches hold sponges, sample mascaras, or a few cotton pads. Securing them keeps items visible and prevents them from getting buried.
Use Elastic Loops Inside Pockets
Most backpacks have pen loops or elastic straps designed for pens or cords. Thread lip liners, eyeliners, or slim brushes through these loops to keep them upright and easy to spot.
Keep Must-Haves Within Reach
Make a list of three to five daily essentials and stick to it. Rotate only as seasons or routines change. This prevents overflow and keeps your quick-grab kit slim.
Next time you’re in the hallway between classes and need a shine check, you’ll thank yourself for this setup.
Maintain Hygiene and Cleanliness
A clean makeup setup means healthier skin and a fresher-smelling backpack. Follow these steps to stay on top of maintenance.
Clean Brushes Regularly
Makeup brushes collect oils, dead skin, and bacteria that clog pores. Wash them at least once a week with gentle soap or brush shampoo. Rinse until the water runs clear, reshape bristles, and let them air-dry flat. Carry a small spray bottle of brush cleaner for quick refreshes between washes.
Replace Expired Products
Even if they look fine, makeup products degrade over time. Mascara lasts about three months, foundation six months, and lip products up to a year. Toss old items promptly to avoid infections and ensure the best performance.
Wipe Down Pouches Periodically
Fabric and plastic pouches attract dirt around seams and zippers. A quick swipe with an antibacterial wipe keeps grime at bay. For days sweaty from gym class or rainy commutes, see teen girl backpack hygiene tips for gym days.
Air Out Your Makeup Bag
Over time, moisture trapped in creams can make your pouch smell stale. Leave it open and empty overnight in a dry, ventilated spot. This prevents mildew and keeps the bag fresh.
If you ever notice a musty smell, it’s your cue to air out and wipe down your pouch right away.
Pack for Different Occasions
Your makeup routine shifts from Monday morning to Saturday night. Customizing your kit for each scenario keeps your backpack from becoming overstuffed.
School-Day Essentials
On a typical school day, lighten your load to must-haves: tinted SPF moisturizer, spot concealer, and clear lip balm. Blotting papers and a mini mirror help you check shine between classes. Leave heavy palettes at home to keep your bag light.
After-School Touch-Ups
Club meetings, sports practice, or music rehearsals call for a slightly expanded kit. Add a bold lipstick or a portable two-shade eyeshadow duo. Keep a small brush or sponge handy so you can refresh your look without uprooting your entire bag.
Weekend Hangouts
Weekend plans often mean dinner or movies. Pack a medium pouch holding bronzer, highlighter, a multi-shade palette, and a couple of brushes. Layer this pouch on top of your school essentials in the same backpack or switch to an evening-friendly crossbody bag.
Travel Weekends
Heading out of town? Consolidate your makeup in clear, TSA-friendly toiletry kits. Reserve one pouch for liquids and creams, and another for tools and powders. Stash each in different compartments to avoid spills and streamline unpacking.
If you’re also packing outfits, check out how to pack a change of clothes in a teen girl’s backpack for neat folding tricks.
Customize and Personalize Your Makeup Kit
Your makeup pouch should be as cute and unique as you are. Personalizing your setup makes it easier to spot in a crowd and adds a dose of fun to school days.
Add Personal Flair
Decorate pouches with removable patches, enamel pins, or iron-on custom labels. If you love pastels or glitter, choose stickers that match your vibe. A little personal touch ensures it doesn’t get mixed up with a friend’s makeup bag.
Use Modular Pouches
Opt for pouches with snap-on or magnetic attachments so you can rearrange compartments. Modular kits let you add or remove sections based on your routine. Snap on a brush roll one day, detach it for a night out.
Keep a Mini Perfume or Deodorant
A tiny rollerball fragrance or deodorant stick can freshen you up between classes. Store it in its own little case or a designated mesh pocket to prevent scent transfer. It’s a perfect teensy addition to your makeup zone.
FAQs
-
How often should I clean my makeup bag?
Aim for a full wipe-down once a week. If you notice powder or stains sooner, clean it right away to prevent buildup. -
Can I pack full-size makeup products in my backpack?
You can, but travel-size or smaller versions reduce weight and risk of breakage. If you need full-size items, place them in a padded pouch near the center of your bag. -
What’s the best way to carry lipsticks and glosses?
Store them upright in a small divider or mini cup inside your pouch. Upright tubes stand better when they aren’t jostled by heavier items. -
How do I prevent eyeshadows from cracking?
Add foam or cotton between palettes and the pouch lining. Vertical storage also cuts down on impact if your bag gets bumped. -
Can I use lunchbox organizers for makeup?
Yes, bento-style organizers with compartments can work great. Just line each section or add padding for extra protection. -
Should I store makeup in my locker instead of my backpack?
Lockers are a good option if you have one. Keep only daily essentials in your bag and stash the rest in your locker to lighten your load. -
What’s a simple hack for quick touch-ups?
Keep a small “face kit” with tinted moisturizer, multitasking lip balm, and blotting papers in an easy-reach pocket. You’ll be ready in seconds.
Conclusion
Packing your makeup essentials safely in a teen backpack comes down to smart pouches, thoughtful organization, and a few simple hacks. When you choose the right bag, sort by category, and utilize your backpack’s pockets wisely, you’ll avoid spills, cracks, and stress.
Try one tip today, like lining your compact with a cotton pad or setting up a quick-access pocket for lip balm. Your makeup and your backpack will thank you, so you can focus on classes, friends, and all the fun in between.

How To Fix a Backpack Strap Adjuster
How To Use A Camera Backpack For Underwater Gear